

Google Workspace for Digital Marketing
Does your digital marketing strategy involve hundreds of content pages, videos, images, graphics and spreadsheets?
Is your digital marketing team spread across the globe?
Then surely, all your digital marketing experts, content writers, content marketers, graphic artists, subject matter experts, social media experts and people with different talents and responsibilities must collaborate in real-time.
GOOGLE WORKSPACE IS EXACTLY MADE FOR ONLINE COLLABORATION
If you are not using Google Workspace to manage your digital marketing strategy, and unless you are using some digital marketing tool that costs you thousands of dollars every month, you must be facing lots of difficulties and efficiency issues.
In this blog post we are going to explore 10 ways you can use Google Workspace to manage your digital marketing strategy.
HOW DOES GOOGLE WORKSPACE FIT INTO YOUR DIGITAL MARKETING JIGSAW PUZZLE?
Digital marketing teams are mostly agile teams. You need to quickly scale them. This means that lots of collaboration happens.
Maybe some of your digital marketing team members are working on an e-book. They may need to do lots of research and compile their findings in a document that can be shared by everyone.
Multiple writers might be working on the e-book text. They might be living in different cities and different countries.
Your editors might be living somewhere else.
Graphic designers who will be creating the needed art for the e-book might be working from somewhere else.
The entire team may have to brainstorm using group chats and video chats multiple times in a day. They may need to keep track of all the discussion threads.
They may need to store all the files in a cloud-based storage space so that they can be accessed whenever needed, irrespective of where the person who needs the files is situated.
This is exactly what Google Workspace is made for: online collaboration, communication and file sharing.
Everything your digital marketing team needs to collaborate, is present in the form of one feature or another in Google Workspace. In fact, there is no tool better than Google Workspace if you need top-notch collaboration capabilities in an online software.
Now let’s see how you can manage your digital marketing strategy using Google Workspace.
1. LET PEOPLE EASILY RECOGNIZE YOU WHEN THEY GET YOUR EMAIL
Branding and familiarity are very important in the online world. A big effort of digital marketing goes into making your name and brand familiar to your target audience, and one of the first steps you can take is, make it easier for people to recognize you when they receive your email.
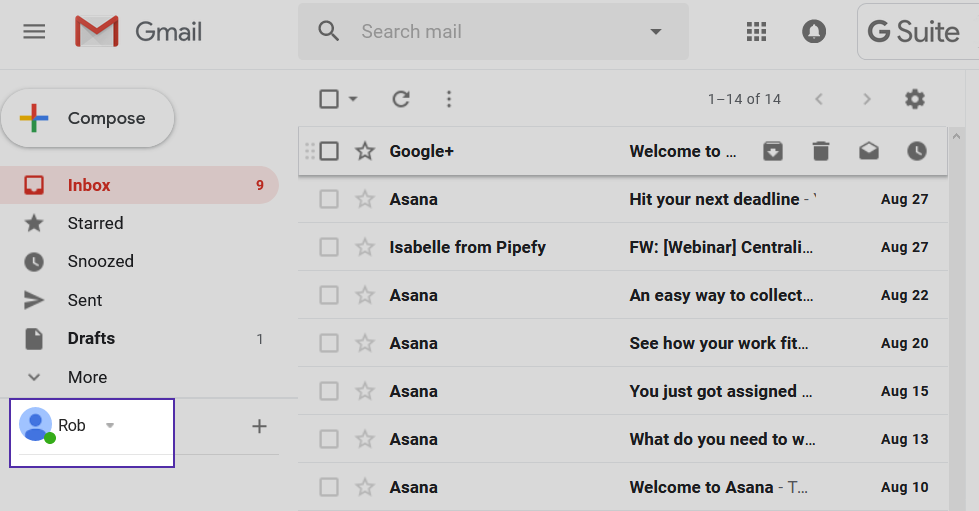
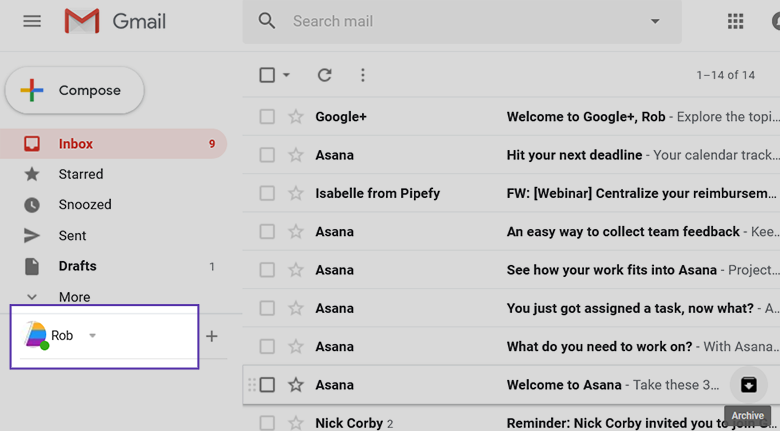
Also, when you are participating in Google Hangouts, it’s better that people see a familiar profile pic rather than the default grey image Google shows.
This, you can do by having a profile picture with your Gmail (even the official email that you use with your Google Workspace account is conveniently called Gmail).
You can have either your company logo or your own profile pic, whatever suits you.
This is how you change your Gmail profile pic:
Log into your Gmail account (again, the official email account you are using with Google Workspace, not the free Gmail version) and then click the Settings icon.
In the Settings, scroll down until you reach the “My picture” section.
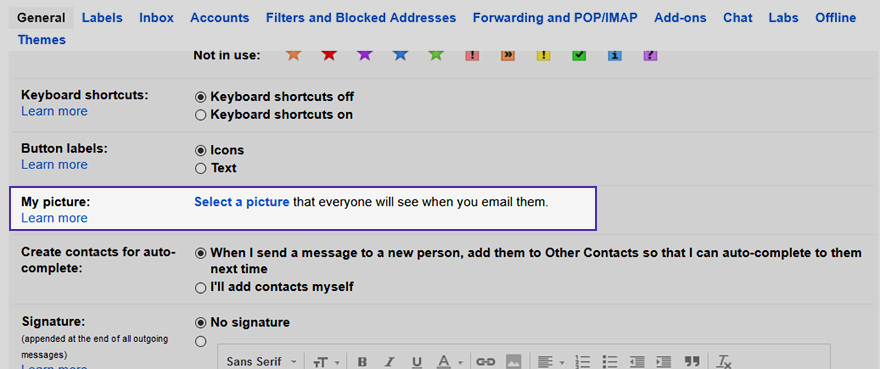
Click “Select a picture”
In the preceding pop-up, use the “Choose File” button to choose the appropriate file from your computer.
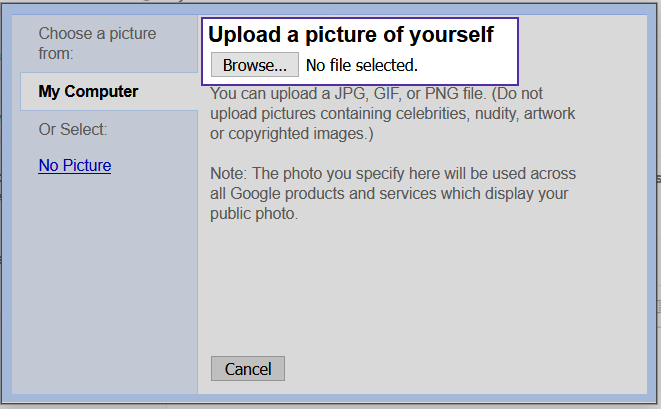
As you will see, the interface asks you to crop the image.

You can either crop the image so that it fits into the black border above, or if you don’t want to cooperate, using a graphic tool, you can resize the photo and try uploading it again. Whatever you decide to do, finally you can click “Apply Changes”.
As you can see, the image has been uploaded. You can decide whether your Gmail profile pic is visible to everyone or just those who are present in your contact list. Preferably, make it “Visible to everyone”.
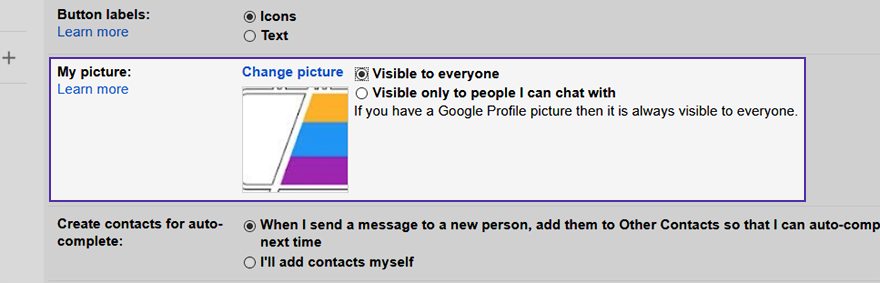
Scroll down and click “Save Changes”.
Now your profile pic is saved, and it will be visible to all who interact with you using Gmail and Google Hangouts.
2. MAKE YOUR PROMOTIONAL CAMPAIGNS MORE EFFICIENT BY SAVING CANNED RESPONSES IN GOOGLE WORKSPACE
As mentioned above, email marketing is one of the most potent ingredients of digital marketing. You may have to send promotional campaigns repeatedly. You may also have to send replies to many queries and many of these replies may be the same, with a few changes here and there.
Gmail in Google Workspace allows you to save canned responses. As the name suggests, you can create a generic email and then save it as a “canned” message. Later on, whenever you need to send such a message, just retrieve the canned message, make a few changes, and send it.
Benefits of saving multiple canned messages include
- You significantly reduce the chances of error as you are not retyping the same thing again and again.
- You can save time as you can quickly make changes in the existing message and send it.
- You never fail to send important information because it is always present in your canned message.
This is how you can use canned messages in Google Workspace.
- Go to Settings in Gmail
- Go to the “Labs” tab
- Scroll down to the “Canned Responses” section and choose the “Enable” radio button
- Save and come back to the inbox
- Compose a new message and write whatever text you would like to save as canned response
- Click the arrow at the bottom-right corner of the Compose window
- Click on “Canned responses”
- Click “New canned responses”
- Enter the name by which you would like to save this canned response
To use the canned response
- Compose a new message (or you can reply to an existing message)
- Click the arrow at the bottom-right corner of the Compose window
- Click on “Canned responses”
- In the subsequent pop-up menu, look for the name of the canned response you would like to use in the “Insert”
The entire process is explained with screenshots, below
Log onto your email account, as mentioned in the above point, go to Settings and look for the tab “Labs”.
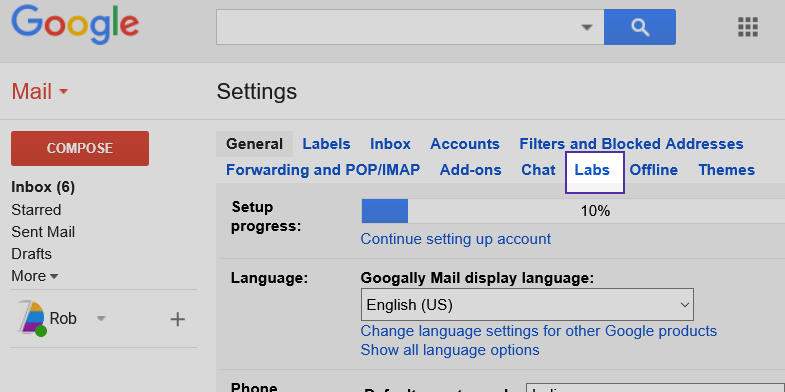
This is a section where Google adds features for experimentation. Don’t worry, the “Canned” feature has been there in Gmail for many years and it is quite mysterious why it hasn’t been removed from the “Labs” to one of the main sections.
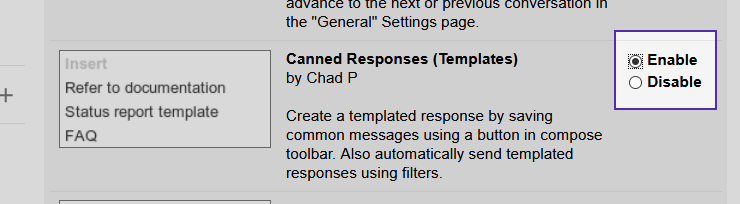
In the “Labs” section, “Enable” “Canned Responses” and then click Save Changes.
Come back to your main inbox and compose a new message.
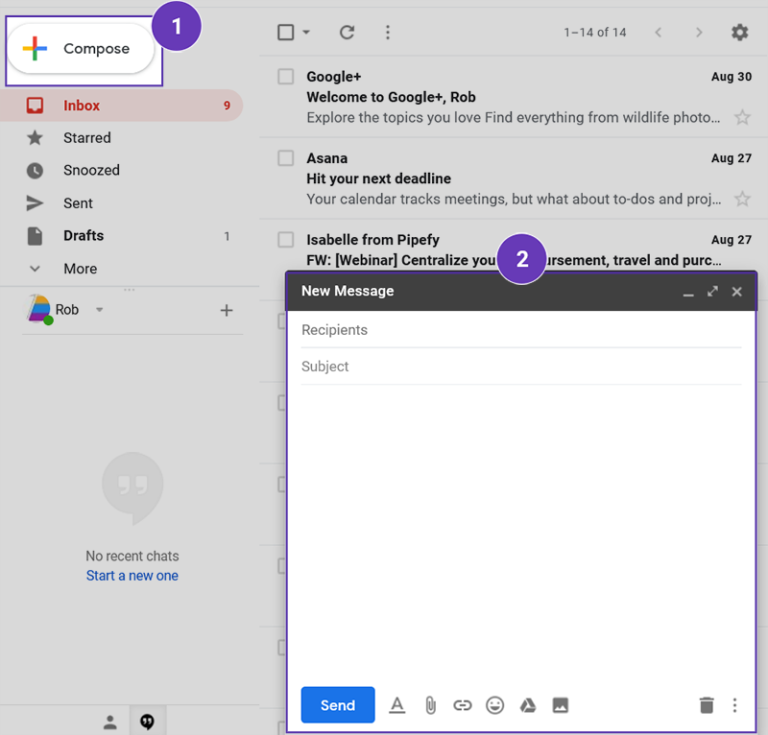
In the “New Message” create a message that you would like to reuse.
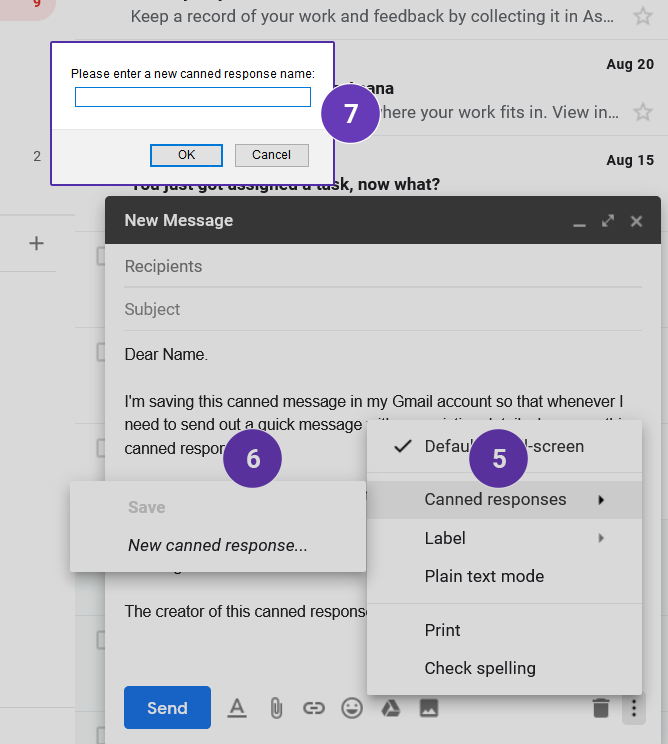
After you have created your canned message, click those vertically arranged three dots at the bottom-right of your browser screen.
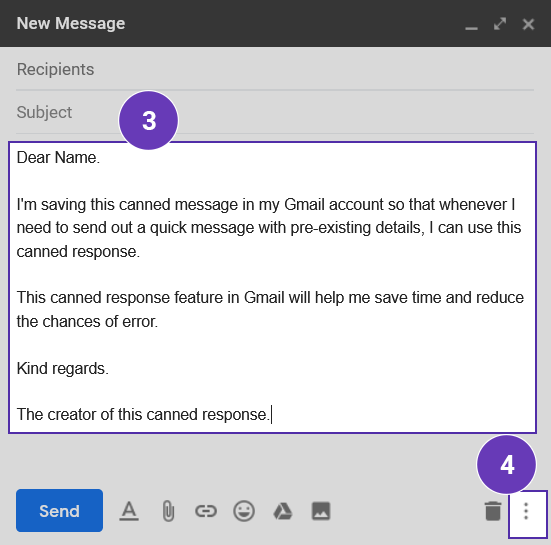
A pop-up menu appears that allows you to save your canned response.

The pop-up window that appears (where you enter the name of the new canned response) when you click “New canned response…” appears at the top so look over there because one tends to get confused about where is the next step.
The above steps will allow you to save the new canned response. Now, how will you use this new canned response? The steps are quite simple.
When you want to send a new message or reply to a message, simply open the email editing window as usual and click the same three dots at the bottom-right.
In the subsequent pop-up you will see the option of including your canned message.
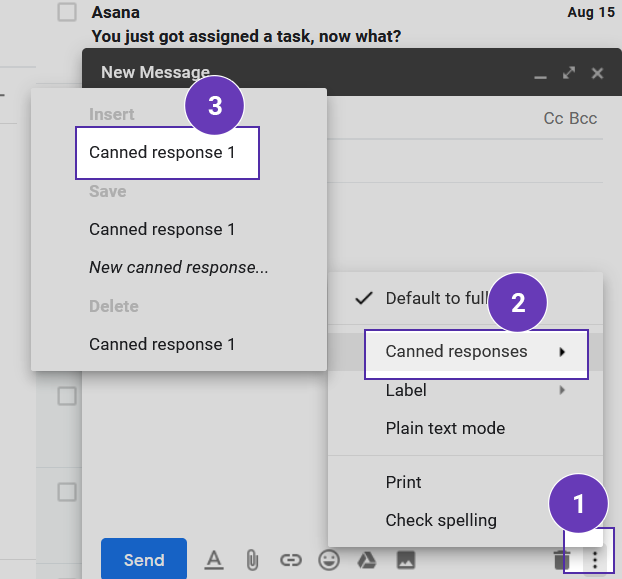
This will insert the canned response into your new message (or the reply).
As you can see in the pop-up on the left, you can use the existing canned response, you can save a new canned response, you can modify an existing canned response and you can also delete the existing canned response.
3. MANAGE YOUR DIGITAL MARKETING CAMPAIGNS USING GOOGLE CALENDAR IN GOOGLE WORKSPACE
You can keep track of your team’s schedule using Google Calendar, an integral part of Google Workspace.
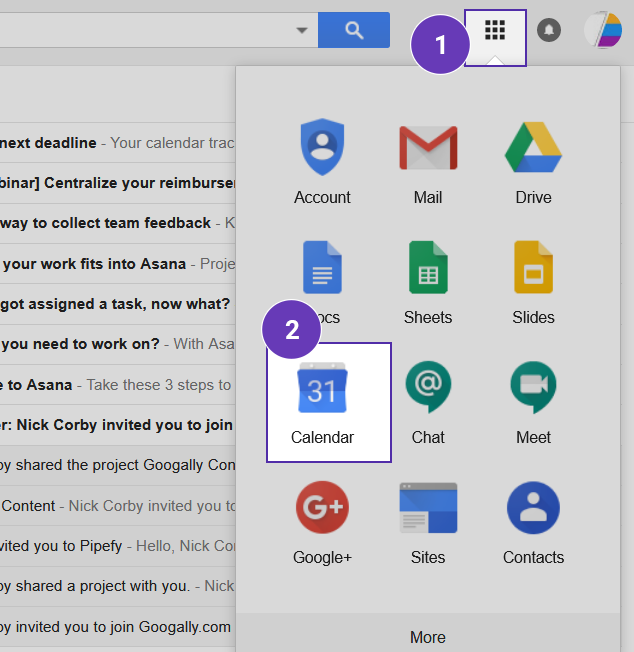
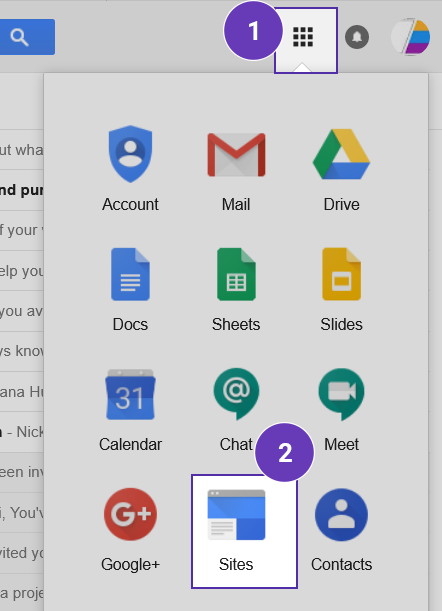
You can go to Google Calendar from your Gmail account or when you are working in one of the Google services. Assuming you are in your Gmail account, you can launch Google Calendar this way:
Once you are in Google Calendar, on the left hand side you will find the “Add a coworker’s calendar” link.
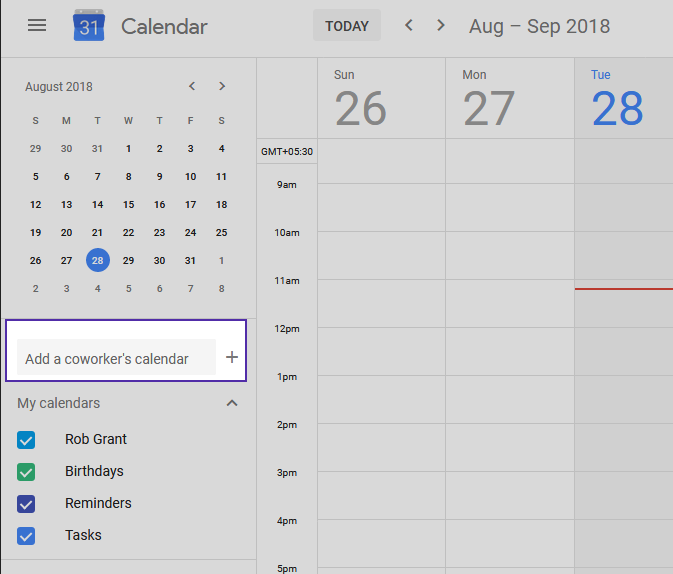
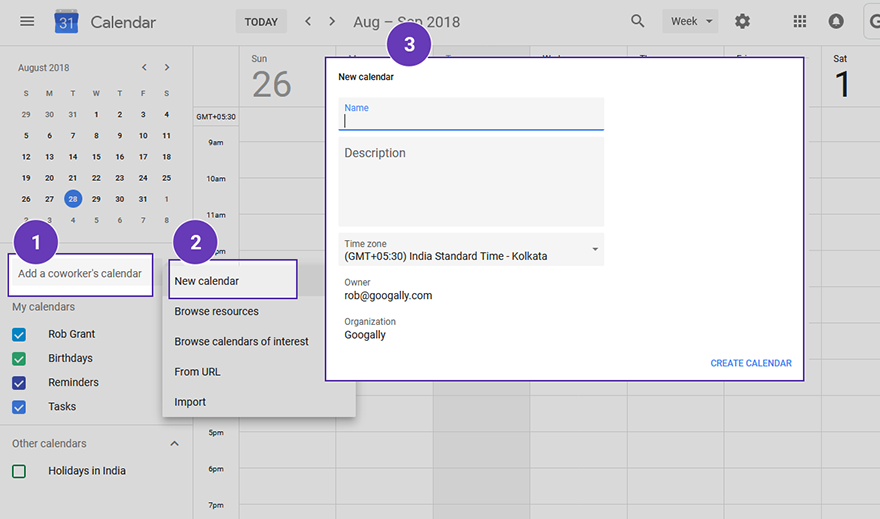
Don’t worry. You can use the same link to add a coworker’s calendar, and also, to create a new calendar. You can create a new calendar specific to your ongoing digital marketing campaign.
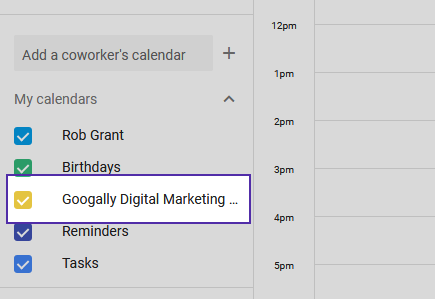
Your newly-created calendar becomes visible among the list of calendars that you can manage:
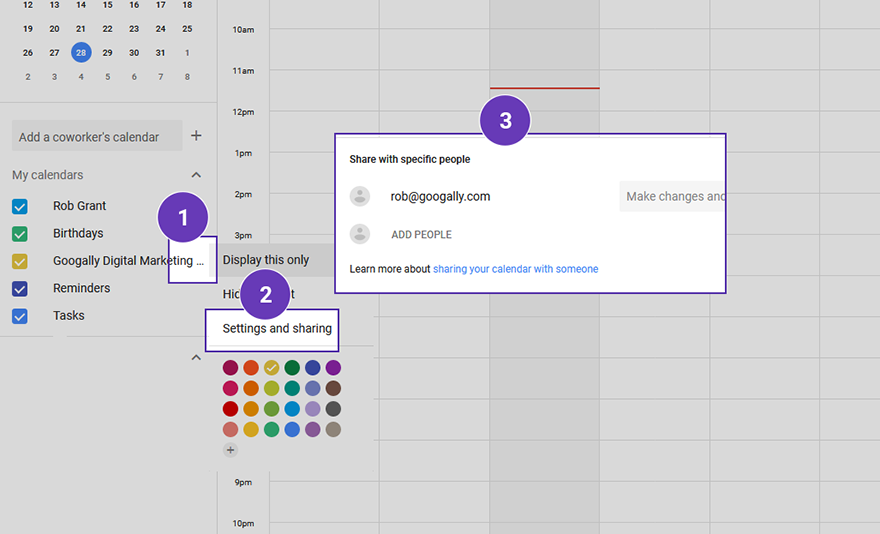
You can use the three dots in front of the calendar name to add people to your calendar.
4. USING THE GOOGLE WORKSPACE GOOGLE DRIVE TO COLLABORATE ON YOUR DIGITAL MARKETING CAMPAIGN
You will be creating scores of files – documents, videos, graphics, audio, photographs, slides, PDFs – when working on a particular digital marketing campaign.
Since multiple people will be accessing these files, you can create a dedicated folder in your Google Drive and then you can share this folder with all the team members.
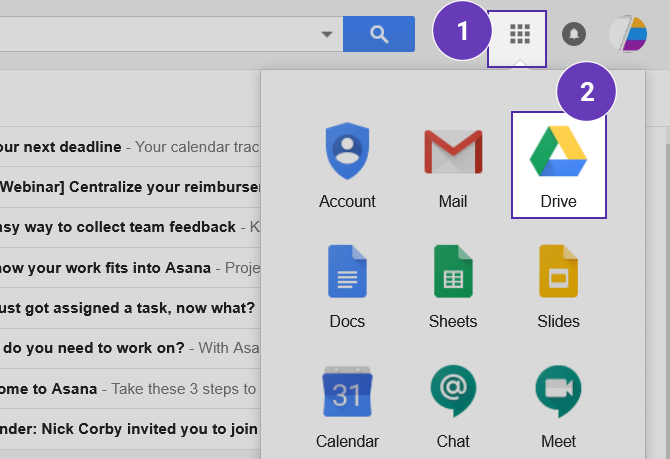
To achieve this, go to Google Drive from your Gmail (or any of the Google Workspace apps you might be using) and from there launch Google Drive.
Once you are in Google Drive, you can create a new folder dedicated to your ongoing digital marketing campaign.
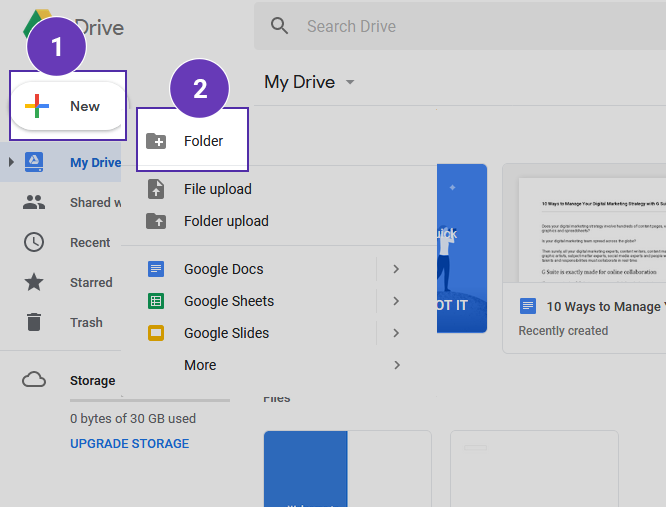
Enter the name of the folder

The folder becomes visible in your Google Drive.
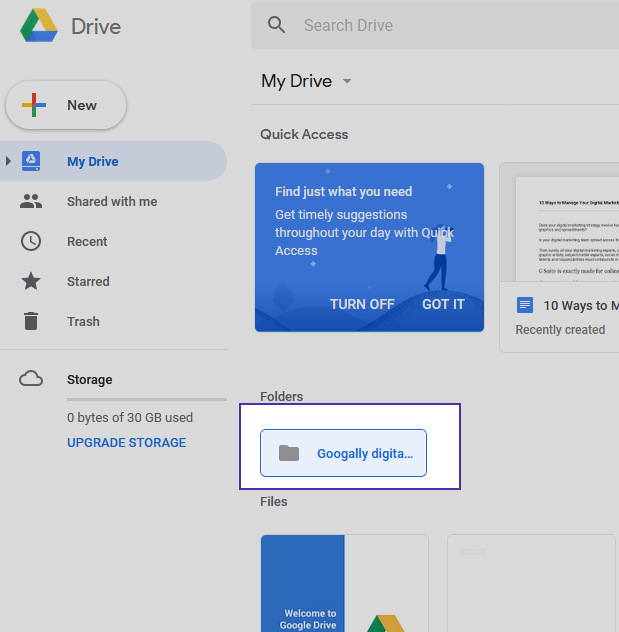
If you already had a folder named “All digital marketing campaigns”, you could have gone inside that folder (by double-clicking its name) and then created a new folder there, following the same command route.
Coming back to this recently-created folder, right click on the name and you get the following pop-up:
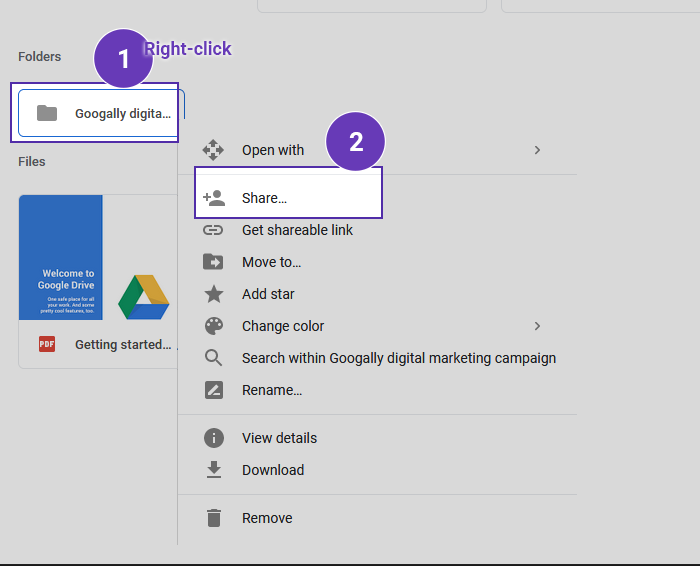
As you can see in the image above, in the proceeding pop-up, you have various options of sharing this folder with your digital marketing team members.
If you click “Get shareable link”, you can straightaway send them a link.
In the box that says “Enter names or email addresses…” you can enter the email ids of all the people working on your current digital marketing campaign.
By clicking the drop-down arrow near the pencil icon, you can decide how you would like to share the folder. People can either have all the rights (create, edit or add new files) or they can just view the contents of the folder.
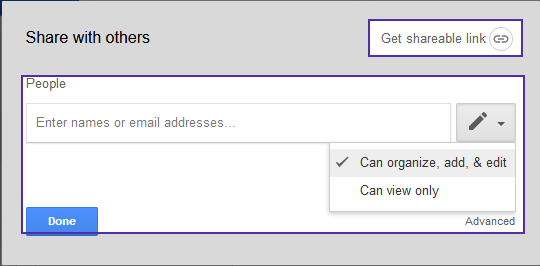
In the above screenshot, you can also see a tiny grey link “Advanced”. Click it, if you want. When you click it, you come across the following pop-up window:

5. CREATE AN ONLINE PRESENCE FOR YOUR BUSINESS USING GOOGLE SITES IN GOOGLE WORKSPACE AND RENDER MORE POWER TO YOUR DIGITAL MARKETING CAMPAIGN
Google Sites is mostly for creating internal websites or intranets, but you can also use this feature in Google Workspace to enhance your digital marketing strategy.
Google in its documentation says that you can improve your search engine rankings by creating a site using Google Sites.
This is how you can create a Google Site to instill more power into your digital marketing campaign:
First, go to Google Sites.
Since Google keeps on upgrading its services, sometimes it offers older or newer version, seemingly randomly. Upon entering Google Sites, some of you may encounter this dashboard:

Although you may proceed with this dashboard, the “New Google Sites” has a better interface and more features, so you may like to switch over to the newer interface.
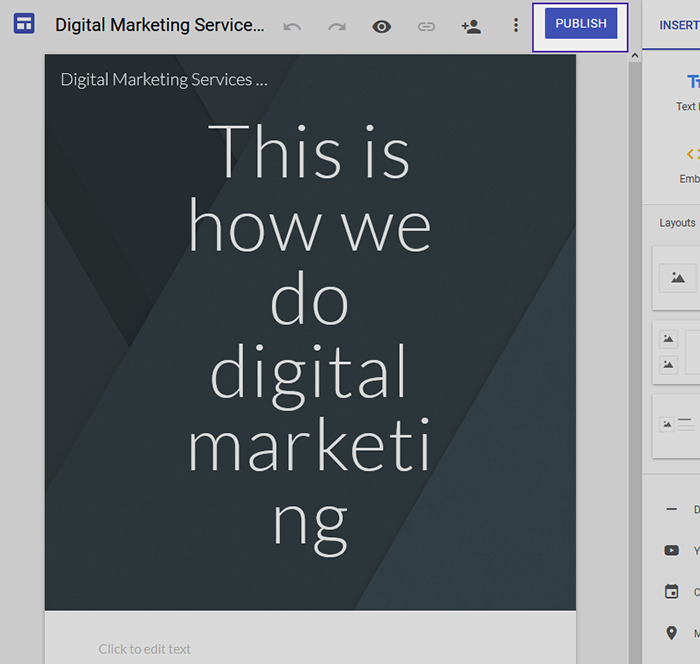
Once you have switched over to the new dashboard, click the + sign to create a new Google Site.
Initially, you get something like this
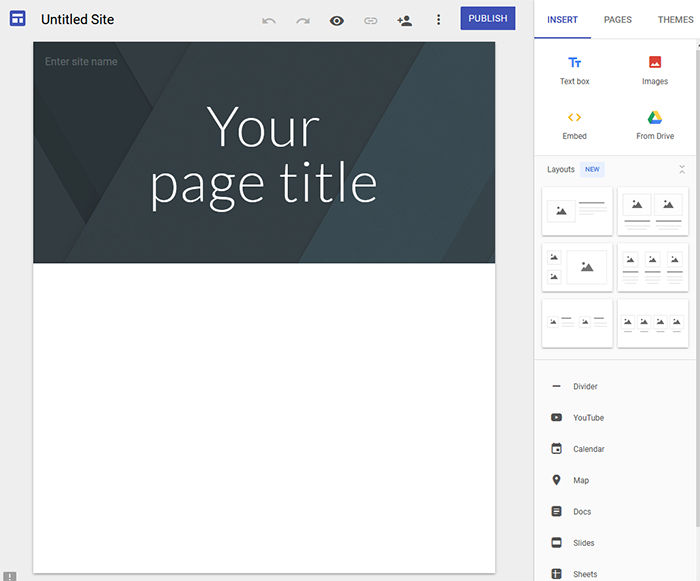
If you hover your cursor around the text “Enter site name”, you are given an option to upload a logo for your website.
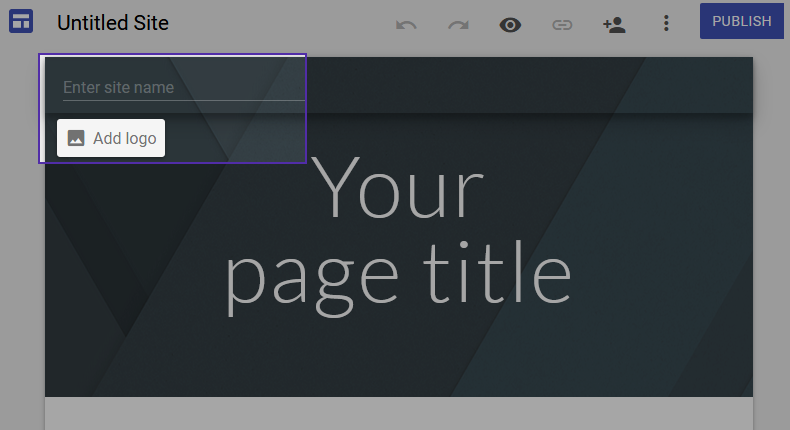
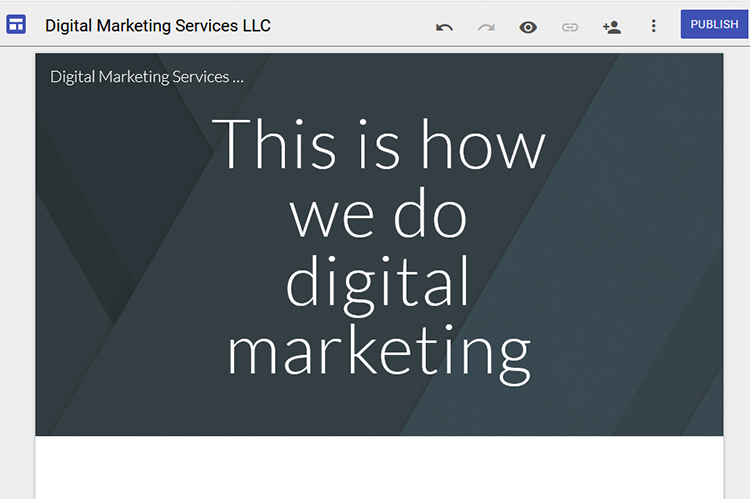
If you want, you can upload a logo. You can also enter the site title and the page title.
What’s the difference between the site title and the page title?
Site title: Your companies name, for example, “Digital Marketing Services LLC”
Page title: A title for this particular page: “This is how we do digital marketing”.
Obviously, you would like to add more components to this webpage. The toolbar on the right-hand side will help you. It contains different components that you can add to your webpage.
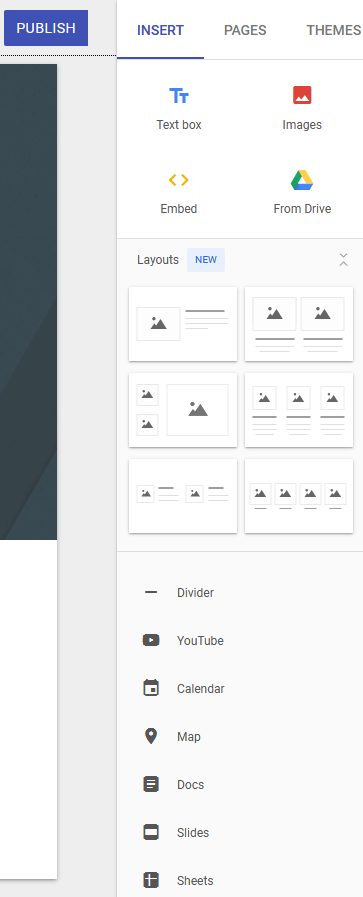
If you want to add some text to the newly-created webpage, you can use the text box:

Similarly, you can drag various components to the empty space and add different bits of information. As you can see on the right-hand side toolbar, you can add images, embed components, upload files, YouTube videos, calendars, Google Maps and even documents from Google Docs.
A typical website has multiple web pages. So, you can add more pages by going to the PAGES tab.
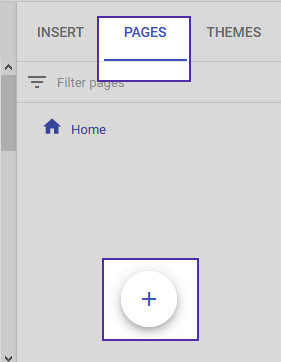
Once you are under the PAGES tab, you can add a new page by clicking on this icon at the bottom.
Once you have worked on your Google Site to your heart’s content, you can publish the site by clicking PUBLISH.
When you click the PUBLISH button, you come across this screen:
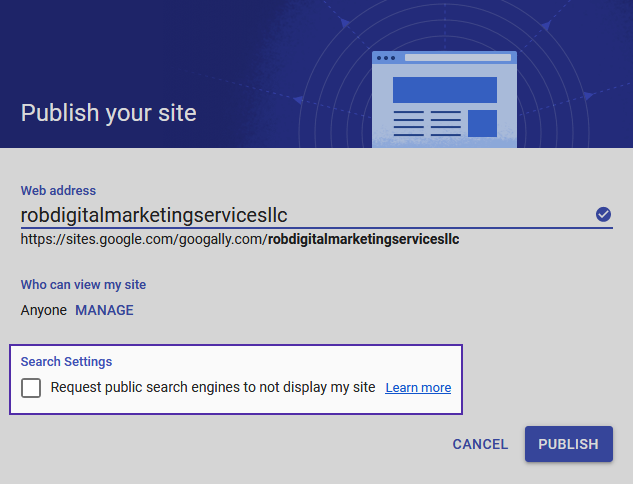
As you can see, you need to supply the web address. In the web address, only numbers, alphabets and dashes are allowed. Not more than 30 characters.
You are creating this Google Site for digital marketing, so you would like it to be accessible to maximum number of people. Hence, you would like to go to the section “MANAGE”. Clicking on MANAGE brings you to this pop-up window:
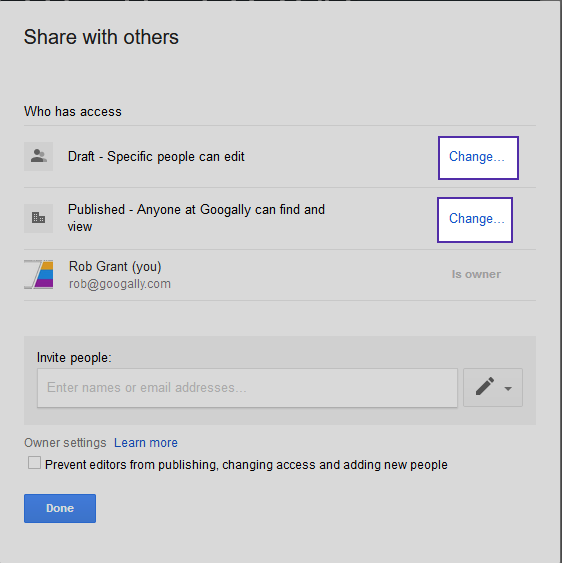
As you can see in the above screenshot, there are various settings you can change before you finally publish your Google Site.
If multiple people are going to manage your Google Site, they may be able to change the contents of the website. You can decide who all can edit your site by clicking the facing “Change…” link against “Draft – Specific people can edit”
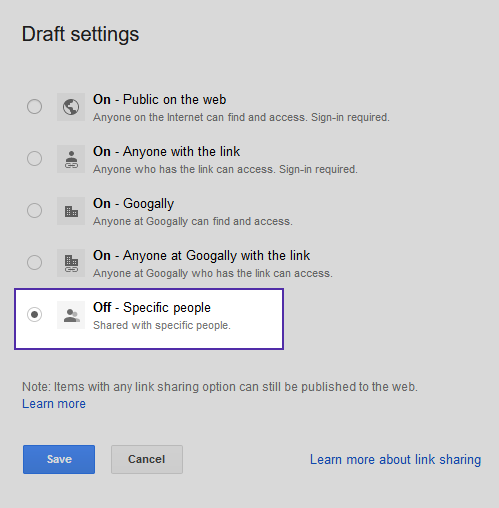
Since you don’t want everybody who has access to the link to be able to edit your Google Site, you only want to allow specific people. So, choose the last option and then click Save.
Referring back to the previous screen:
Now, click “Change…” against “Published – …” – – [“maps demo” is a group created by the author of this tutorial in the above screenshot, the text may appear to be something else in your case], and you come across this pop-up screen:
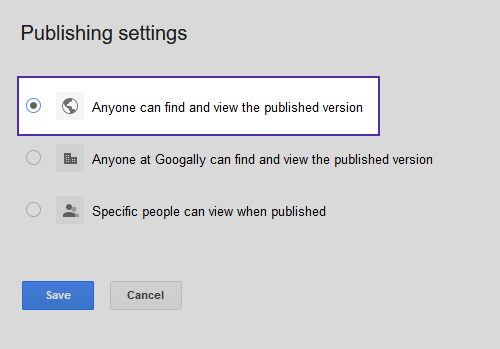
Since you want your Google Site to be accessible to people as well as search engine crawlers, you would like to choose the first option “Anyone can find and view the published version”. Click Save.
Another thing you might be interested in is the “Request public search engines to not display my site” checkbox.
But, to give a push to your digital marketing effort, you don’t want to check this checkbox. You want search engines to crawl your Google Site so that you can get more traffic from search engines.
Click PUBLISH and now your Google Site is publicly available. You can keep on adding more content to it to further improve your search engine rankings.
6. USE GOOGLE+ TO CROWDSOURCE FEEDBACK WITHIN YOUR ORGANIZATION, OR EVEN PUBLICLY
Google+, as you may already know, is Google’s answer to Facebook. It might not be as widely used as Facebook, but by the end of 2017, Google+ had 375 million active users. According to this Forbes article, in a survey of 180,000 social media users, Google+ scored a satisfaction rating of 81/100 compared to 68/100 for Facebook.
Whenever you have published a new blog post or a webpage, or whenever you want to brainstorm on a new digital marketing idea, you can post text link on Google+ and invite feedback from your Google+ contacts. You can keep the discussion open or closed, according to the nature of your brainstorming session.
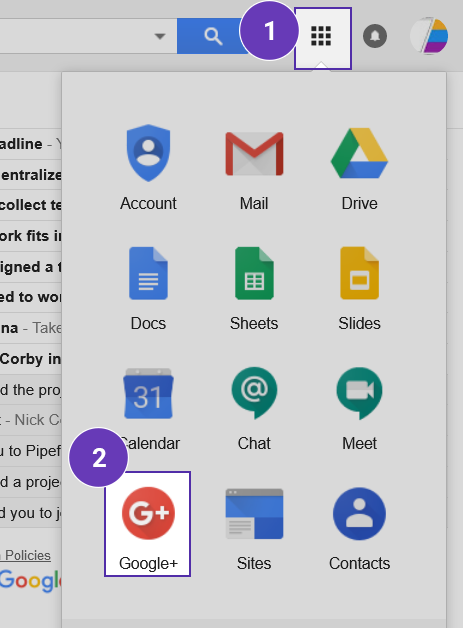
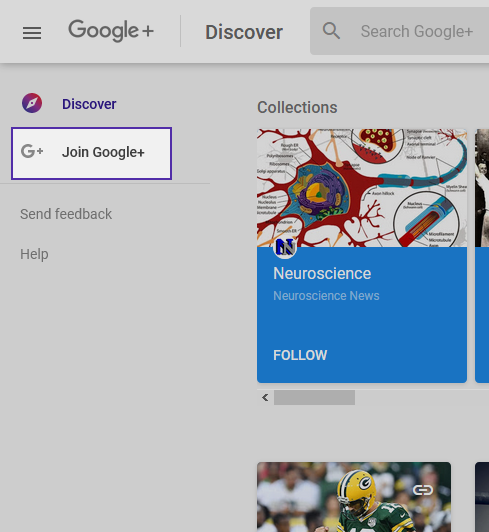
From within your Google account, if you go to Google+, if you haven’t joined yet, you are prompted to join the network.
Before joining, you need to create a profile.
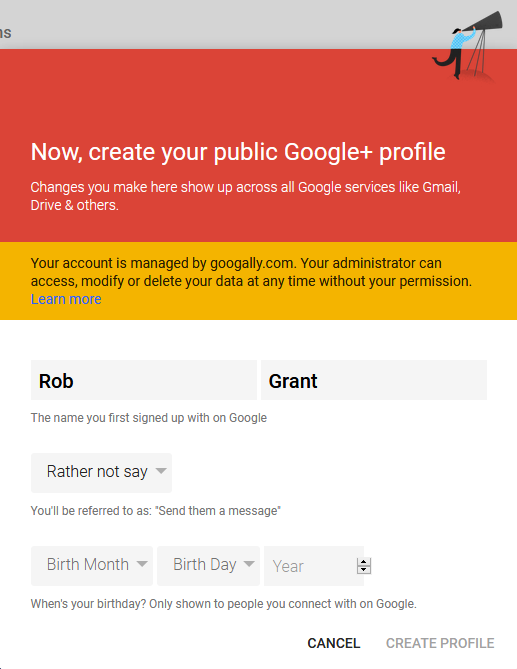
Nothing much needs to be done to create a Google+ profile, although later on you may like to tweak it to customize it according to your organization.
In the proceeding screen, on the left sidebar click Home and you can access your timelines (mostly people you have added as your contacts). Since you may have not added any one yet, you will be confronted by a blank screen. To set the ball rolling, either you can first try to find people who are already on Google+, whom you know and invite them to connect you on Google+, or you can simply post your first update.
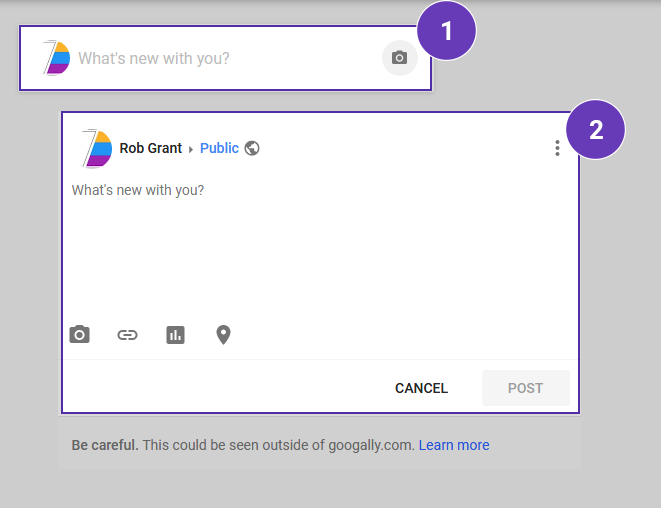
You can write text (where you read “What’s new with you?”). You can post an image, a link, a poll or even your current location.
Once it is POSTed, all the people who have connected with you will be able to leave their comments, and even their own images and links.
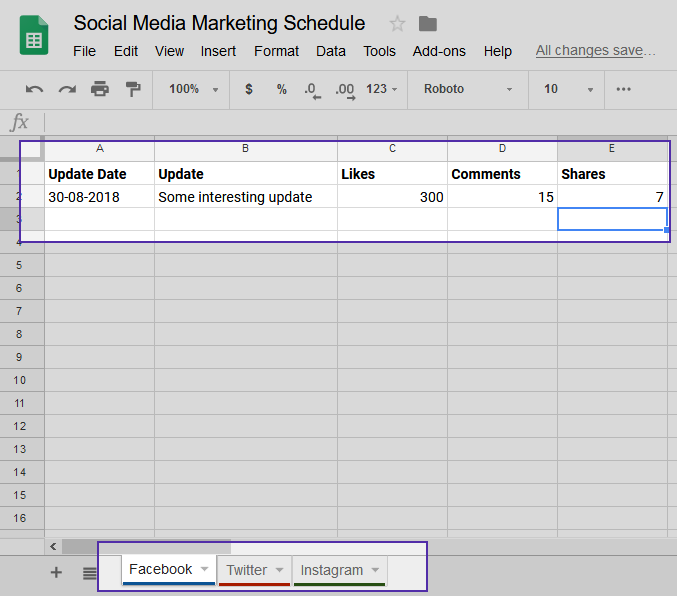
7. CREATE A SOCIAL MEDIA MARKETING CALENDAR USING GOOGLE WORKSPACE SHEETS
Google Workspace Sheets can help you manage your entire social media marketing campaign using a single sheet.
For example, you can have a worksheet for Google+, another for Facebook, another for Instagram, another for LinkedIn, another for Twitter, and so on.
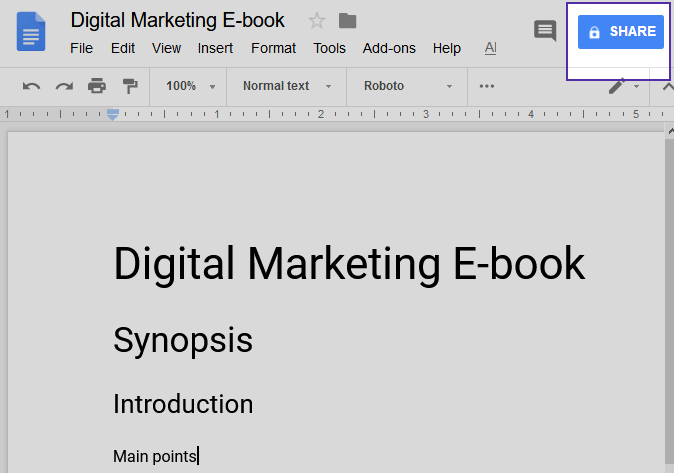
After creating your social media marketing Sheet in Google Workspace, you can share it with your digital marketing team. You can click the SHARE button at the top.
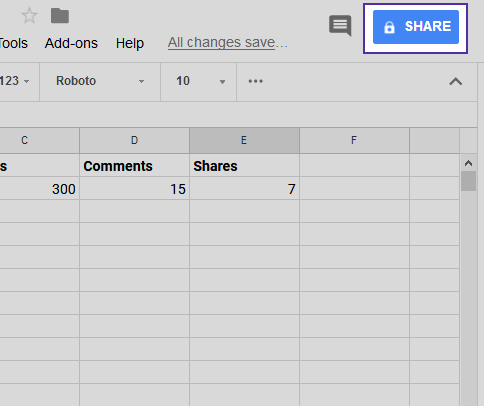
You can follow the steps already explained in the section “Using the Google Workspace Google Drive to collaborate on your digital marketing campaign” on how to share a file or a folder you have created in Google Workspace.
After you have appropriately shared social media marketing sheet with your collaboration team, everyone will be able to access it.
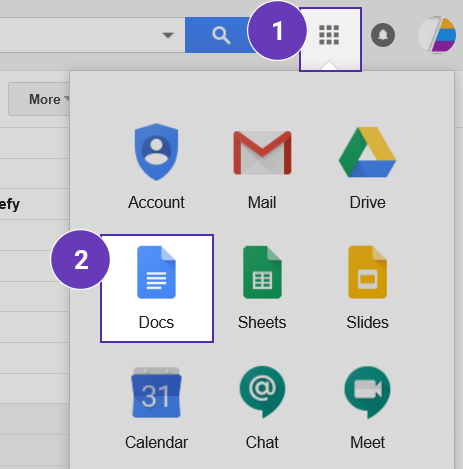
8. COLLABORATE ON CONTENT MARKETING USING GOOGLE WORKSPACE GOOGLE DOCS
Whereas social media marketing platforms are mostly for content distribution, you will be creating lots of content as a part of your digital marketing strategy and you may have to collaborate with many writers, editors and authors within or outside of your organization. This is where Google Docs in Google Workspace can prove invaluable.
You can create a Google Docs document and then share it with your colleagues and digital marketing team members. Start Google Docs.
Open a new blank document (if you haven’t already gotten the document working for you).
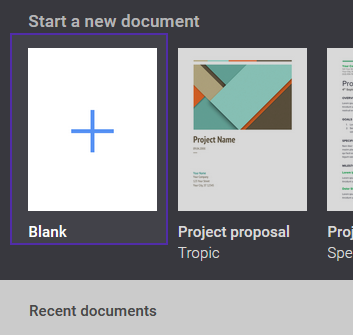
After opening the blank document you can create an outline and then share the document with your team using the method described in the section “Using the Google Workspace Google Drive to collaborate on your digital marketing campaign”.
9. OBTAIN CUSTOMER INSIGHTS USING GOOGLE FORMS
Every successful digital marketing campaign is based on customer insights. Different organizations have different ways of gathering data from their existing and prospective customers.
A great thing about Google Forms is that you can just send the form link to people you want to survey and all the information that they enter will be saved in the Google Workspace spreadsheet.
First, let’s create a Google Forms.
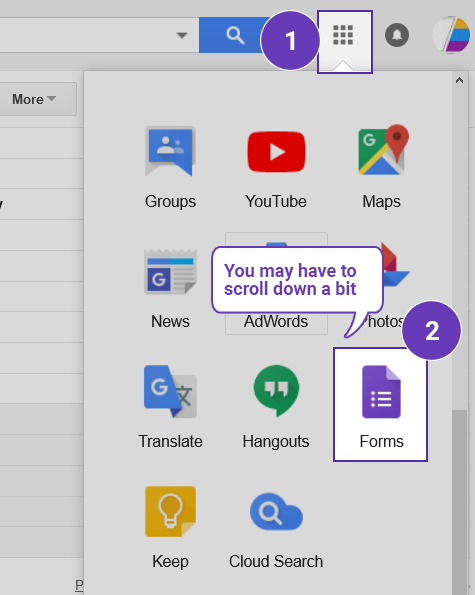
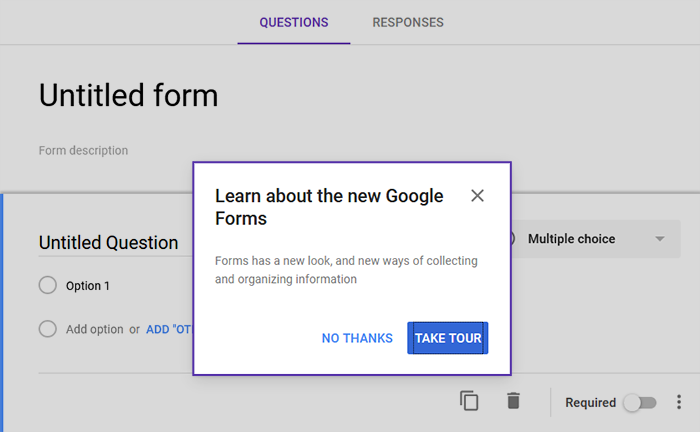
Start a new form.

Google offers to give you a tour of the entire form-creation process but if you want you can click NO THANKS because you are going to learn how to create a Google Form in this tutorial anyway.
You can first create the title of your Google Form and if you want you can also enter the description.

A survey questionnaire means you’re going to ask multiple questions and your survey participants are going to provide you answers and when you have collected many answers, you’re going to draw your own conclusions.
So, after naming your form, you are going to create your first question.
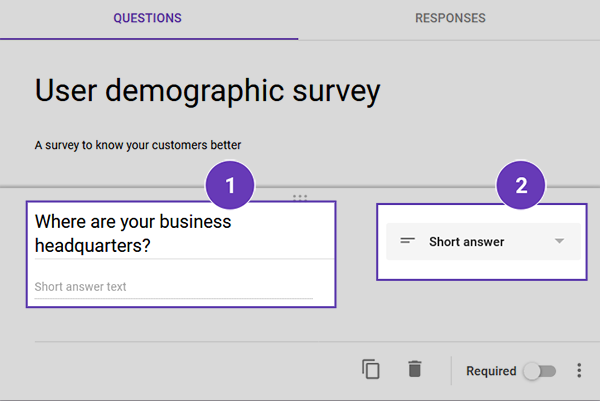
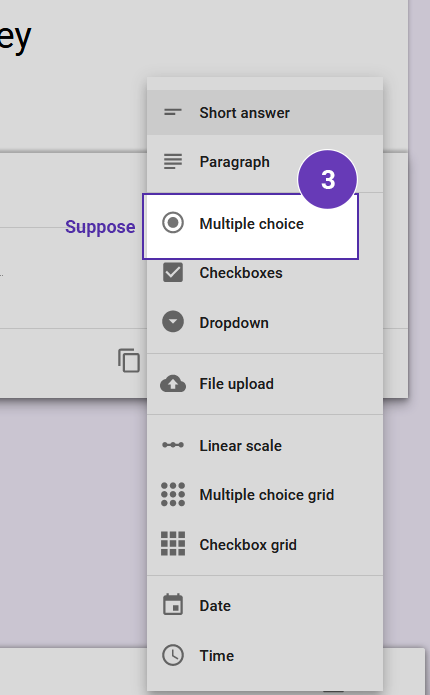
How must the answer be? Your question can be answered in different forms and when you click the down arrow in the above screenshot, you get this set of options:
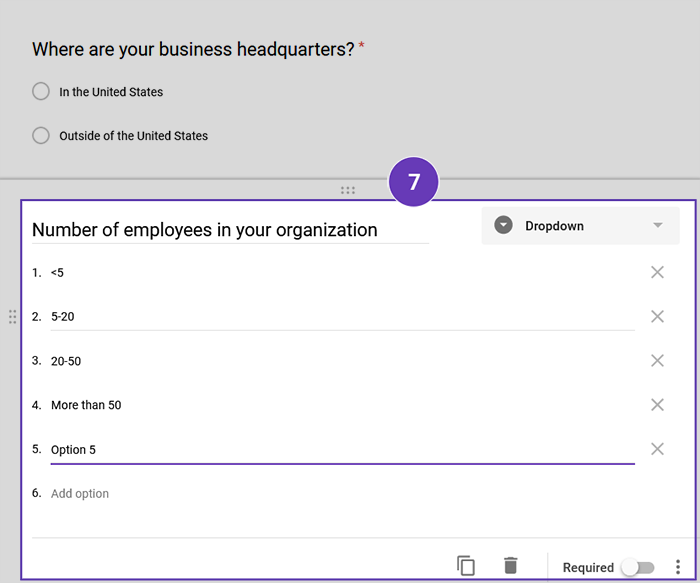
Suppose the answer should be a multiple choice one. Then your first question and its set of multiple-choice options will look like this:
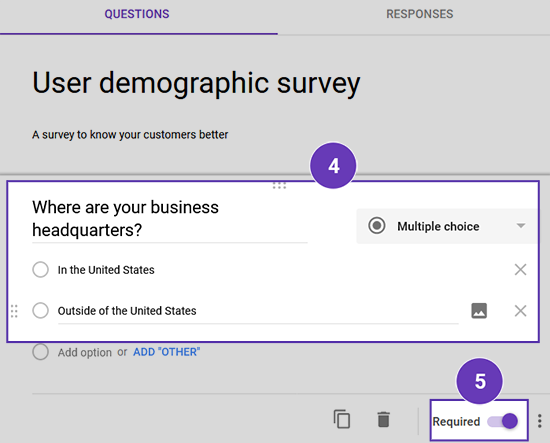
In the above screenshot, if you want this to be a required question, you can switch “Required” on.
Next question? Click the + on the toolbar on the right.
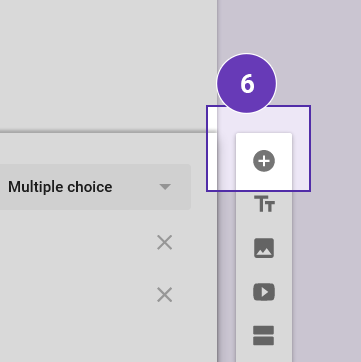
You can add another question, this time with a “drop-down”-answer type.
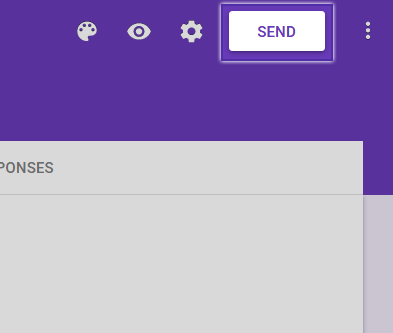
This way, you can add as many questions to your Google Form as you need. As you are creating your form, it is automatically being created. So, once your form is fully created, you can “SEND” to people from whom you want to gather the information.
The proceeding screen gives you an option to enter the emails of people to whom you would like to send the survey form. But, it is good to get the URL so that you cannot just view the form that you have just created, you can also send the form link separately via email.
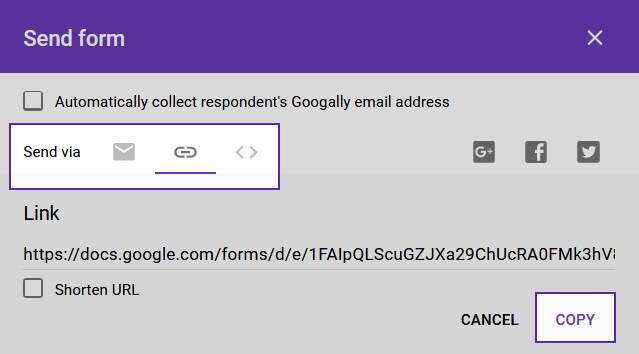
Once you have copied the URL to the clipboard, you can open another tab and load the form just to see how it looks.
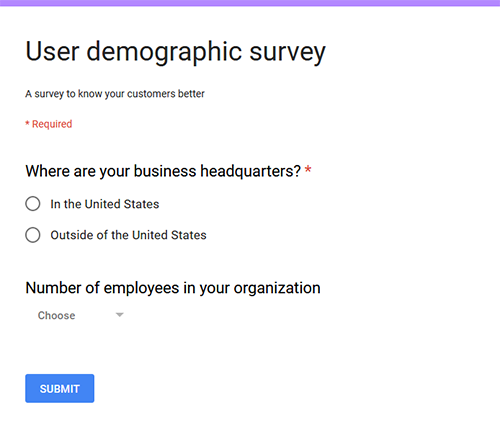
Once you send the link and people start submitting the form, you will be able to see how many people have responded.

Click the RESPONSES tab and you will be able to view the responses to your Google Form.

10. ACCESS GOOGLE WORKSPACE FROM ALL DEVICES
Almost all Google Workspace apps are available from your mobile phone. If you want to manage your digital marketing with Google Workspace in the best possible manner, install the relevant apps on your mobile phone including
- Google Docs
- Gmail
- Google Drive
- Google Hangouts
- Google Sheets
- Google Slides
- Google Plus
So, kickstart your digital marketing by using tools and apps available in Google Workspace.
Related Posts
Explore Tips and Guides! Discover expert insights and practical guides for optimizing your Google Workspace experience with our informative resources.


.png)
.png)


