

Manage Law Firm with Google Workspace
Documentation, collaboration and paperwork are an integral part of a thriving law practice. Until a few years ago, a typical law practice workplace was buried under files, folders and limitless realms of papers, forms, documents and contracts.
Fortunately, most of such information has been digitized.
Switching to Google Workspace will increase the efficiency of your law practice because it makes research, documentation management and collaboration a breeze.
The best thing about Google Workspace is that it entirely runs in the Cloud.
This means, all you need is a browser if you are using a PC or a laptop, or a mobile app if you are using your mobile phone.
Unlike MS Office, you don’t have to install a heavy software application to be able to open even basic documents.
As a legal consultant or a lawyer you must be getting digitally scanned documents from everywhere. People may send you images of documents and contracts that they have clicked from their mobile phones.
A great thing about Google Workspace is that you can open practically every document of every existing format. Whether it is a PDF, a Word doc, a Lotus Notes file, a scanned document or a simple text file, you can open every possible file using the Google Docs module of Google Workspace.
Google Docs has a feature that allows you to extract text from images, and that too, in multiple languages. Yes, OCR facility right inside your word processor.
Have you been contemplating switching all your law practice document processing and collaboration needs over to Google Workspace from your conventional Office suite like MS Office but haven’t been able to find enough information to convince you?
This tutorial is going to do just that. After going through these 10 ways you can use Google Workspace to increase your law practice efficiency, you will definitely want to give this magnificent Office suite a try.
1. COLLABORATE WITH YOUR TEAM OF LAWYERS, CONSULTANTS AND SOURCES IN REAL-TIME
Preparing for a trial or a hearing can be an arduous process involving multiple lawyers, legal experts, witnesses, assistants and interns.
There can be a deluge of documents to process, analyse, exchange, prepare and modify, and verify before one feels ready to take on the opposing counsel.
In the absence of a collaborative tool like Google Workspace, your team members may have to sit in a single chamber around a big table, hooked onto their phones if some of the participants are not present in the office.
But, with Google Workspace, you can collaborate on a single document or on multiple documents with people sitting across the globe.
You can create documents, spreadsheets and slides with your team members and stakeholders and immediately receive feedback and suggestions.
You can even share your legal files and documents with people who are not using Google Workspace (for example, people who are using Microsoft Office or Lotus Notes).
In Google Docs, you can
- Collaborate with multiple team members
- Selectively provide sharing access
- Edit documents in real time
- Chat within the documents and files
- Get feedback immediately
- Use revision history to track multiple versions of the same document
- Easily revert back to one of the earlier versions
- Keep an online record of all changes in comments
You can share your documents, spreadsheets and slides very easily in Google Docs. To share your documents and collaborate on them.
Go to Google Drive and open the desired file.
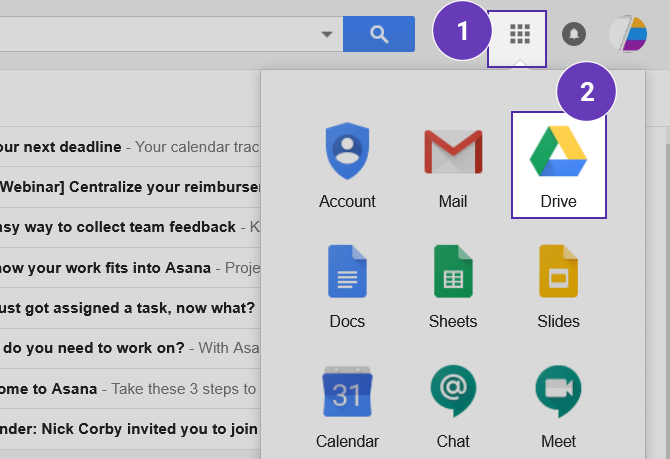
Then select the file that you would like to share…
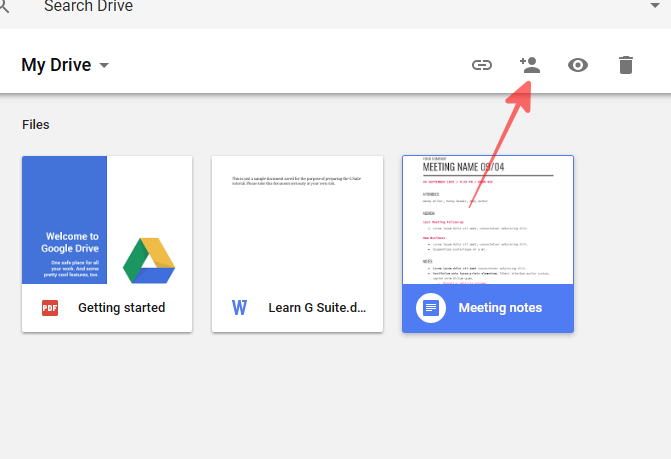
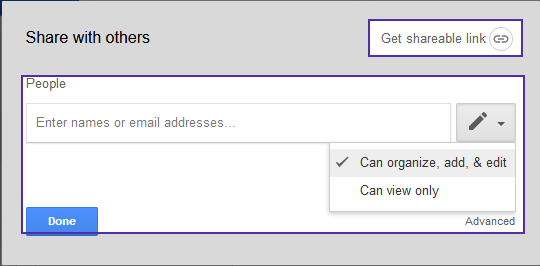
Use your preferred settings to share the documents with all your team members. If you want to know more about how to share your documents and in what different ways you can share with them, check out our blog post on Top 10 ways to work with people not using Google Workspace.
2. MAINTAIN CONSISTENTLY-DEFINED LEGAL TEMPLATES
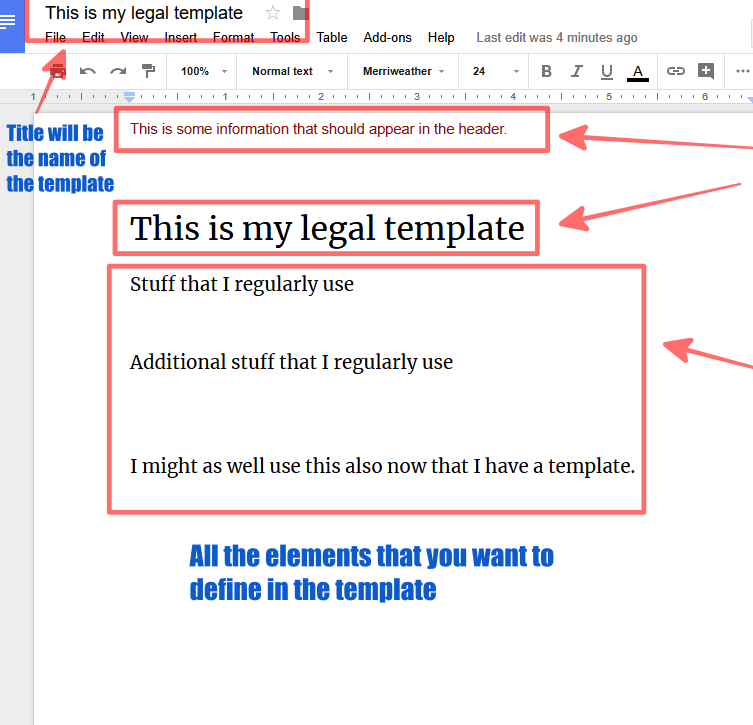
Templates can help you save lots of time because the information that you need to enter repeatedly, almost all the time, can be saved in a template and when you need to use the document the next time, all you need to do is, fill up the extra information particular to a case.
The next time you need a similar document, you don’t need to create it from scratch. Most of the information that you regularly need, will be already there. A good example might be your official logo at the top and your office address in the footer.
Creating and saving a template in Google Docs is very easy.
Go to Google Docs and create a new document. Whatever formatting you want, whatever information you want, just enter it.
After you have filled in the information click that blue box at the top-left:
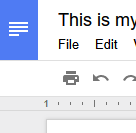
And then click TEMPLATE GALLERY
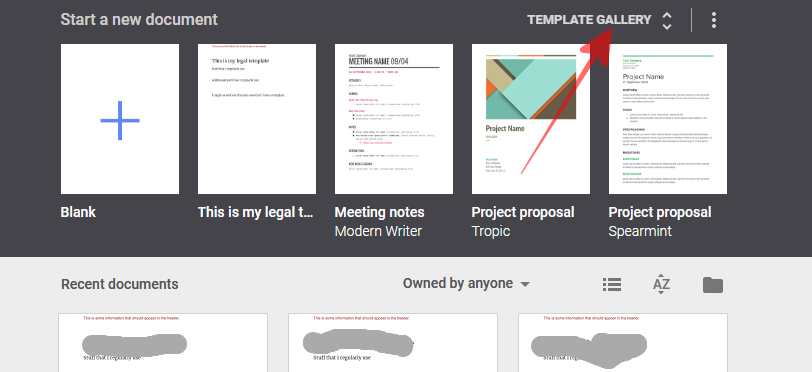
The next screen allows you to add a new template.
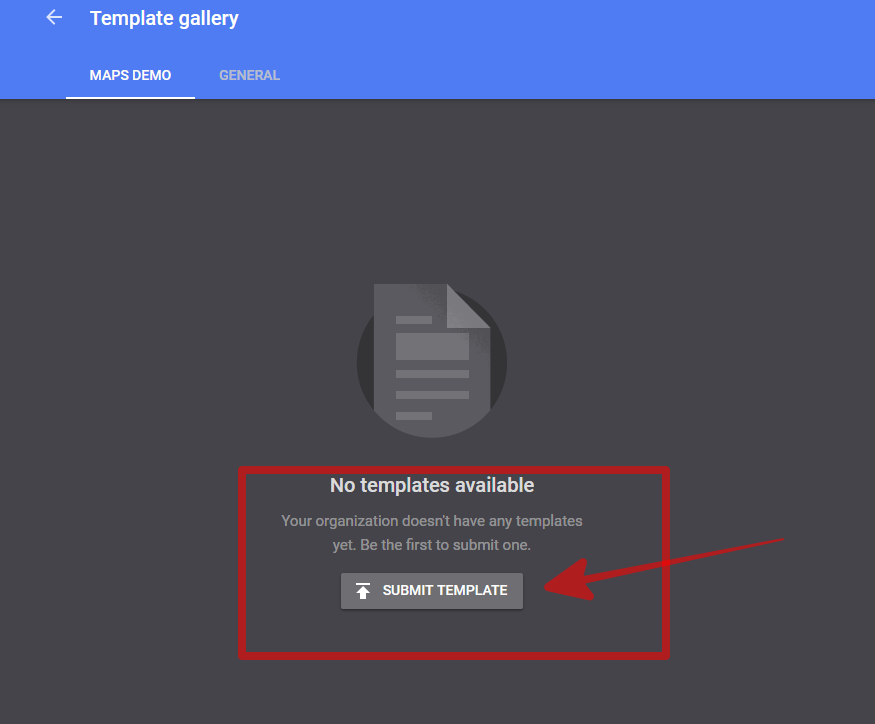
Click SUBMIT TEMPLATE.
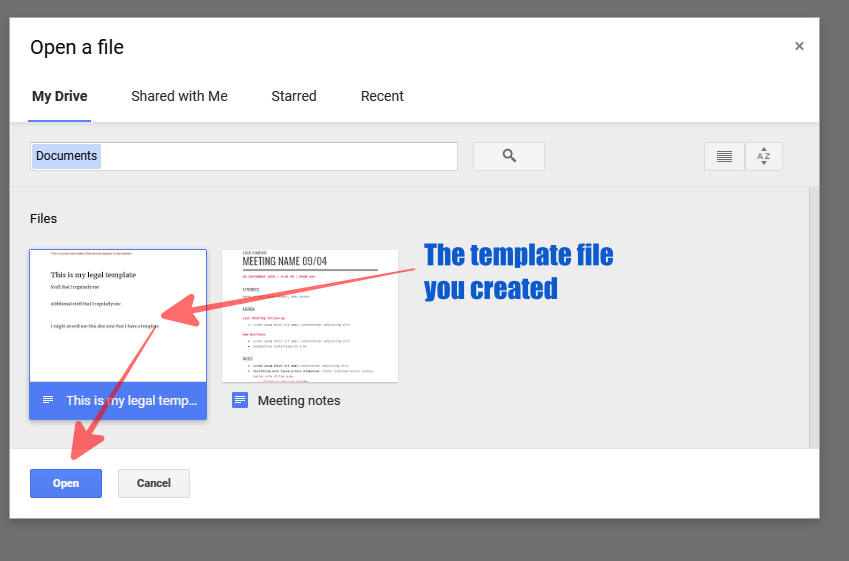
The proceeding pop-up window allows you to select the name of the file that you have just created. You can either use the original file or you can create a copy to create a template.
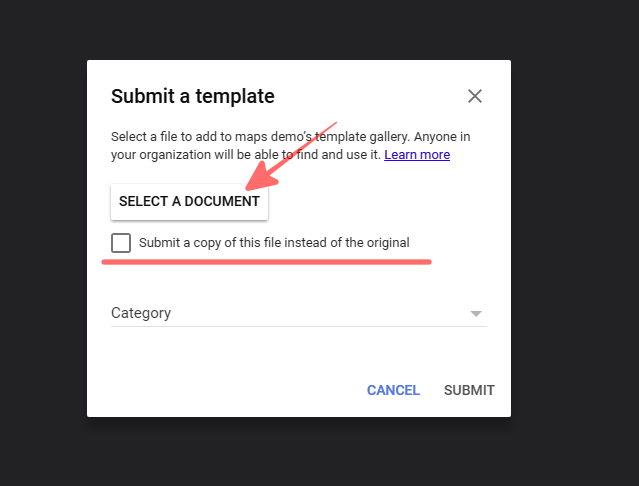
Select the file that you have created and then click Open.
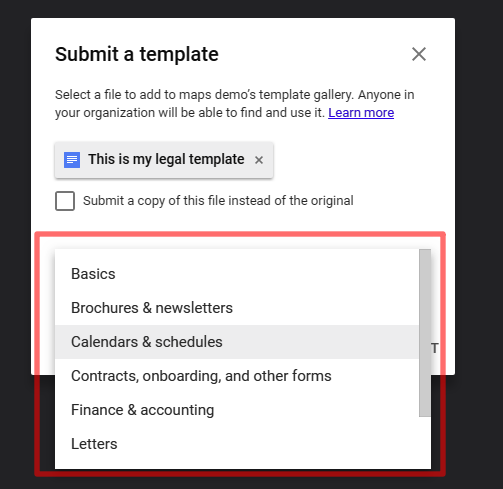
Once you have selected the file that you want to use as template, in the proceeding screen you also have to select the category under which you would like to save your template. This step, although may seem extra, will help you in future if you have lots of templates.

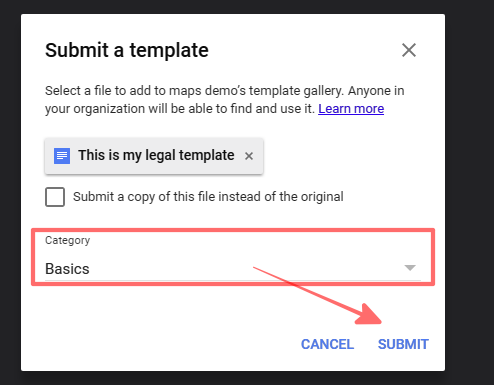
After choosing the appropriate category, you can click the SUBMIT button.
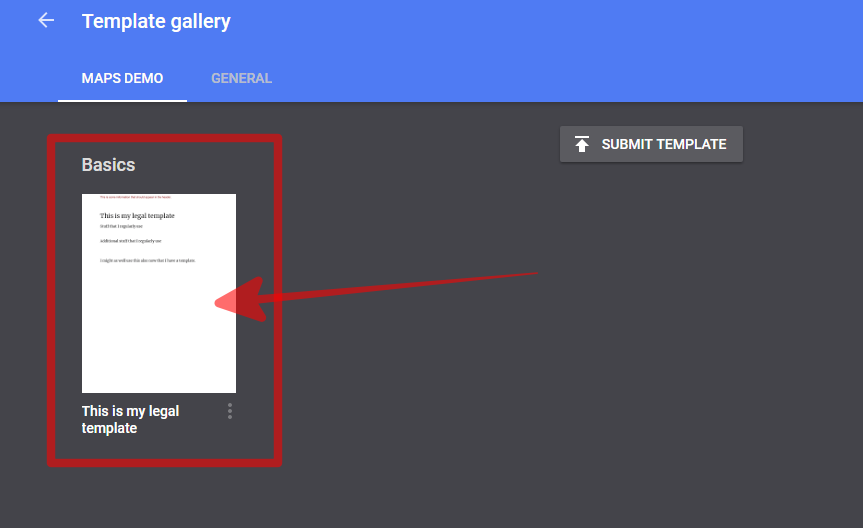
On the next screen you will see that your template has been added.

So, how do you use a template that you have created?
Go to Google Docs and then click TEMPLATE GALLERY
Then select the template that you want to use for your current file:
After opening the template, you may like to rename the file or save the copy. Otherwise, the file will be saved with the same name, although, since it is separate from the template, your template won’t be impacted.

3. SEARCH FOR CITATIONS FROM WITHIN THE DOCUMENTS
In legal work, citations are very important. If some information is being used, you need to make sure that it comes from verifiable sources.
Normally, when you are working in documents and spreadsheets, you have to switch between the document and the browser to search on the Internet.
In Google Docs, you can check the veracity of the information from within your current document. You can add citations to your research, papers, contracts, proposals and projects by choosing the citation format of your preference – MLA, APA or Chicago. This is how you do it…
At the bottom of your current document, you can click Explore.
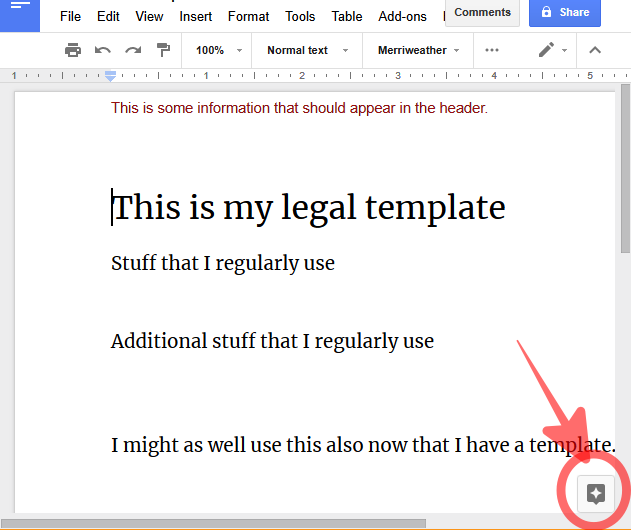
When you click the icon, a smaller, adjacent window appears within the document that you can use to do search.
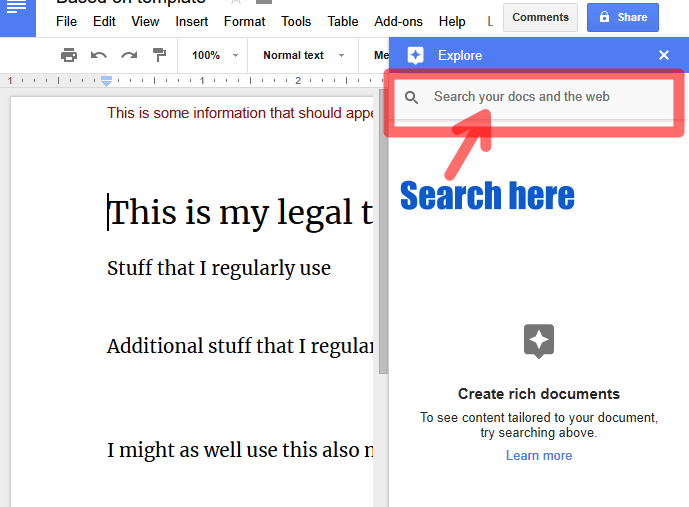
You use the search box just as you would use it on Google. Search for whatever information you want to search.
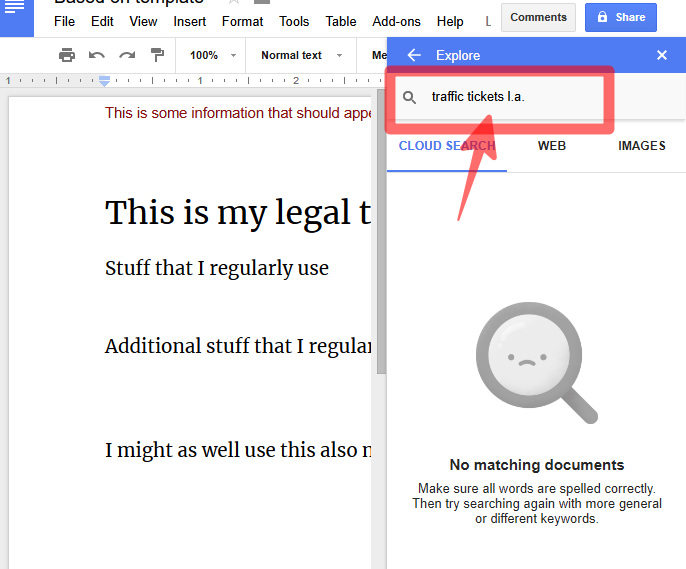
If some information exists on your drive it will be shown here, otherwise, you can go to the WEB tab.
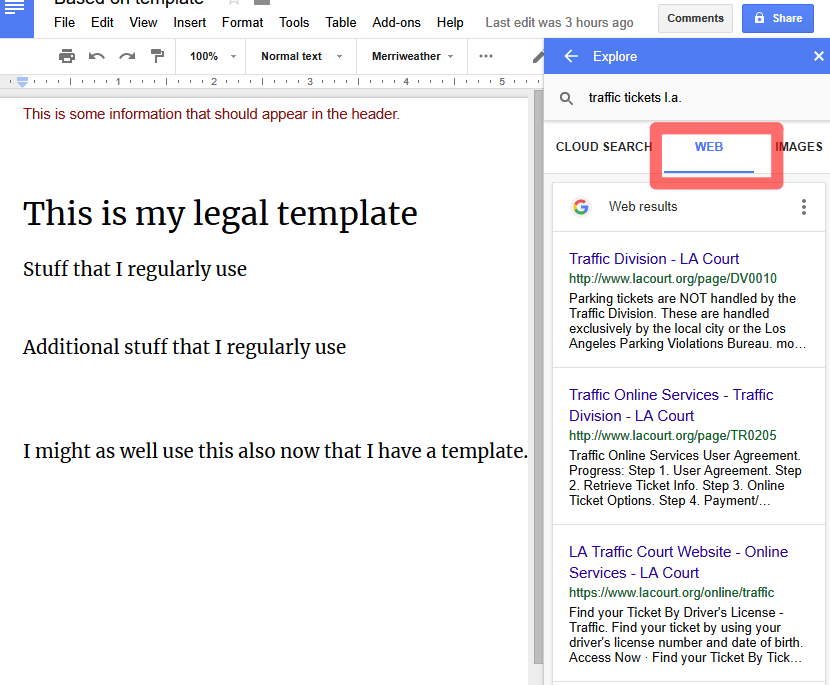
When you hover your cursor over a particular search result, it shows you a quotation mark icon and shows you the tooltip “Cite as footnote”.
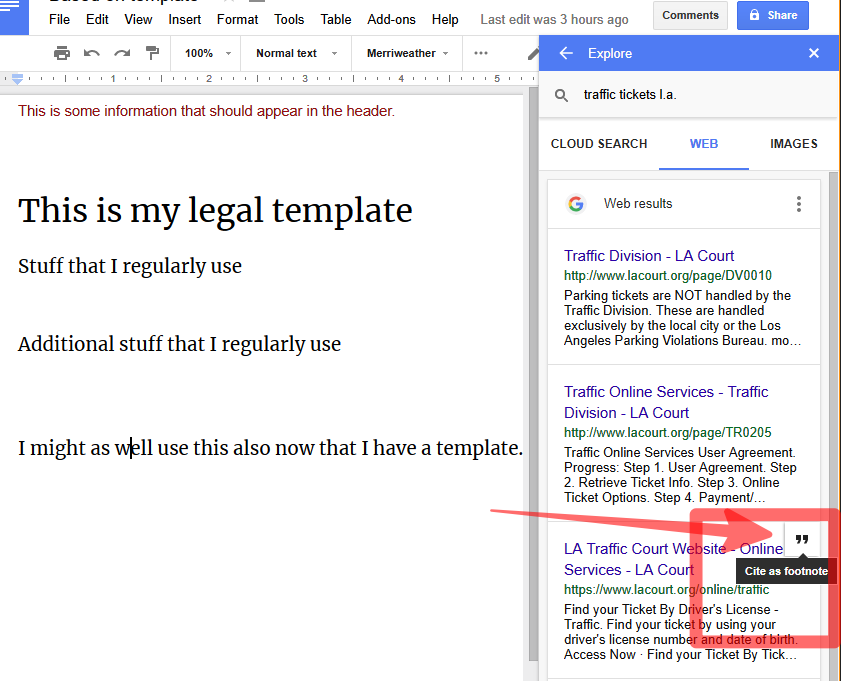
When you click the quotation icon, the citation is inserted in the footer of the document. You can insert as many citations as you want.

4. WORK ON YOUR DOCUMENTS ON THE GO
One of the best attributes of cloud computing (Google Workspace is a cloud computing app/service) is that you are not tied down to a particular spot when you are working on your documents and other apps.
The Google Workspace group of apps allows you to work on your documents and other files on the go. Which means, whether you are at home, at office, in a train or in a car (obviously, being driven by someone else), and as long as you are hooked onto the Internet (there is also an option to work offline), you can work on your documents. You can access your Google Drive from your computer, laptop, mobile phone and tablet PC.
For every individual component of Google Workspace, there is a dedicated mobile app that you can use.
When you are working on a PC or a laptop, every single Google Workspace app is available through your web browser. Individual mobile apps are available for individual Google Workspace apps. Everything you can do on your PC or laptop, you can also do on your mobile app. The Google Workspace apps are available on Android, iOS and Microsoft (their mobile operating system).
5. USE PRESENTATION SLIDES WHEN BRAINSTORMING ON LEGAL ISSUES AND ADDRESSING Q&A SESSIONS WITH MULTIPLE TEAMS
While preparing contracts and documents of very high stakes or when preparing for a high-profile case, you may have to work with multiple legal teams or experts at the same time. You may have to convince people and present to them information in a manner they can understand, both visually and textually.

But that’s just one thing – any decent slide maker these days allows you to create and share slides.
The Slides module in Google Workspace takes the set of features many steps further.
Would you like to know what people think of your impending presentation?
Maybe you want to ask them questions before you present your points through your slide?
Then you can prepare your slide on your presentation based on the questions left by your audience, collaborators or team members.
To send a preview of the slide, open the slide that you’re planning to use and then click the drop-down arrow of the Present button at the top-right.
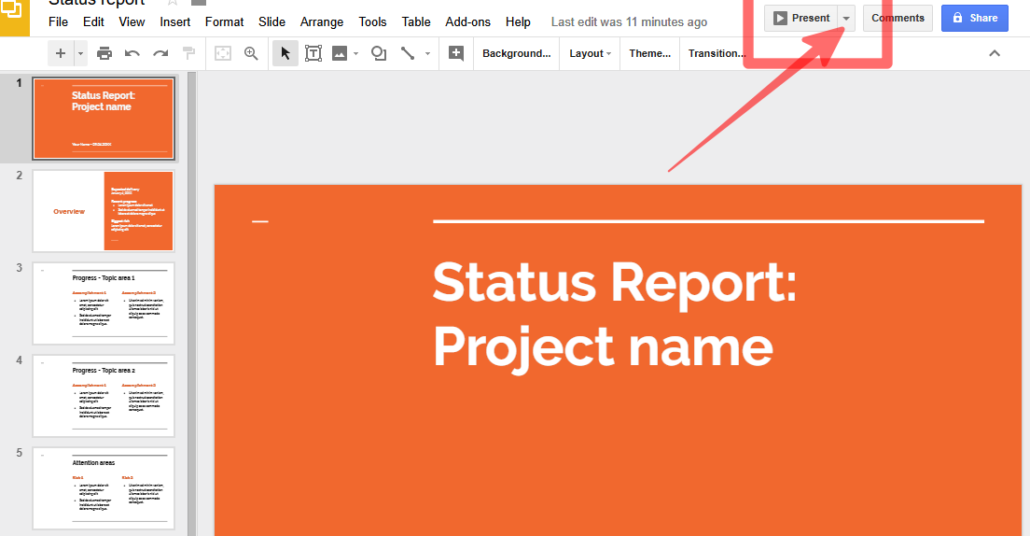
The resulting drop-down gives you the following options:
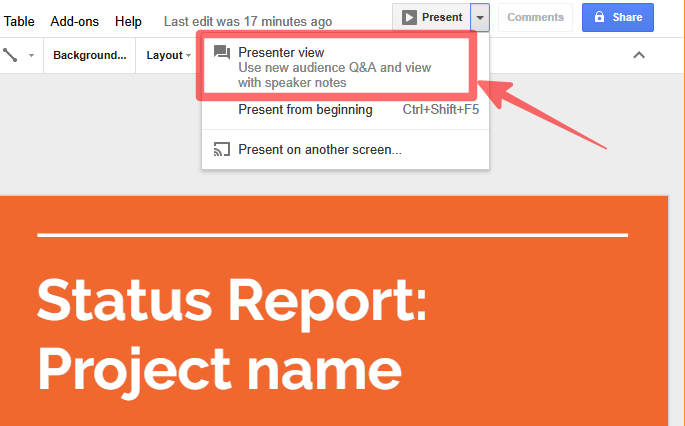
When you choose Presenter view, you can invite people to leave questions and these questions begin to appear in a separate pop-up window:

In this section you can individually respond to the questions left by your audience. The questions will be listed in front of you in the section that states “Questions appear here”.
6. SEND LARGE EMAIL ATTACHMENTS WITH FULL CONTROL IN YOUR HAND
While creating legal documents or preparing the hearings you may have to exchange very large documents with your clients and colleagues. The size of the files may vary anywhere between 30 GB to 30 TB (depending on your Google Workspace plan).
From within Google Docs or Slides (or even from Google Drive) you can email the currently opened file to your collaborators.
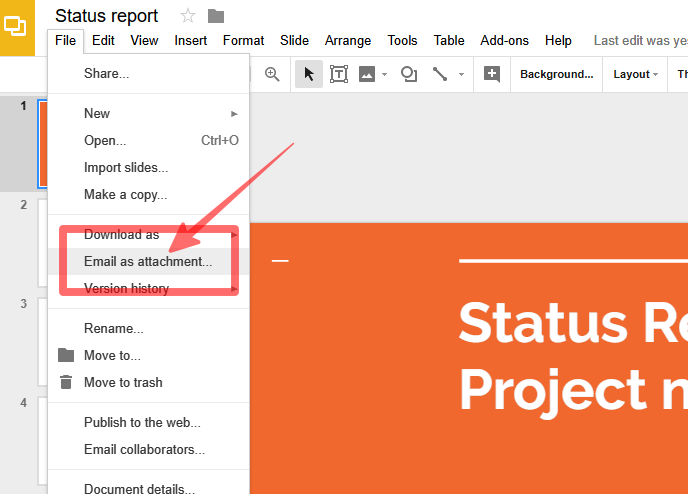
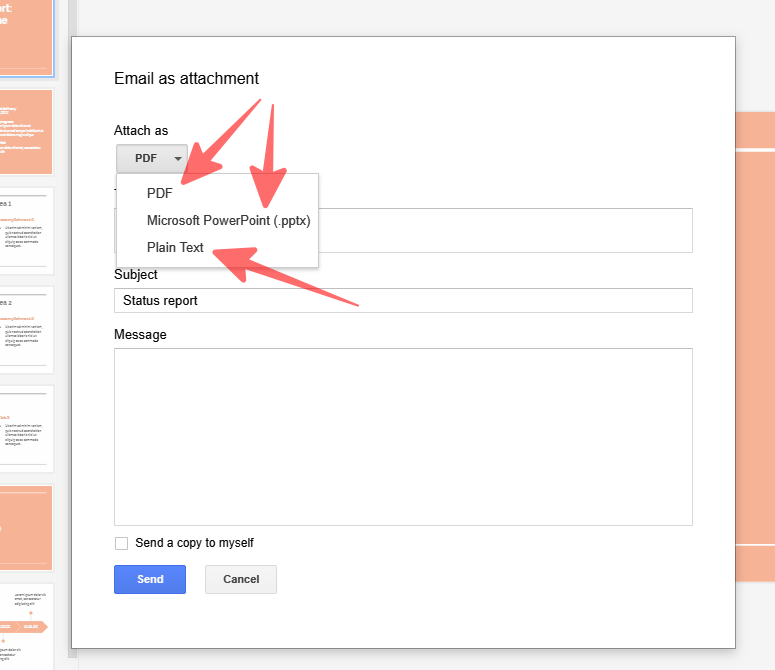
Depending on what sort of document you are currently working on, it will show you all the ways you can send your current document as an attachment. In the above screenshot, since it is a Slide that is opened, you get to send your attachment as a PDF, a Microsoft PowerPoint slide or a plain text file.
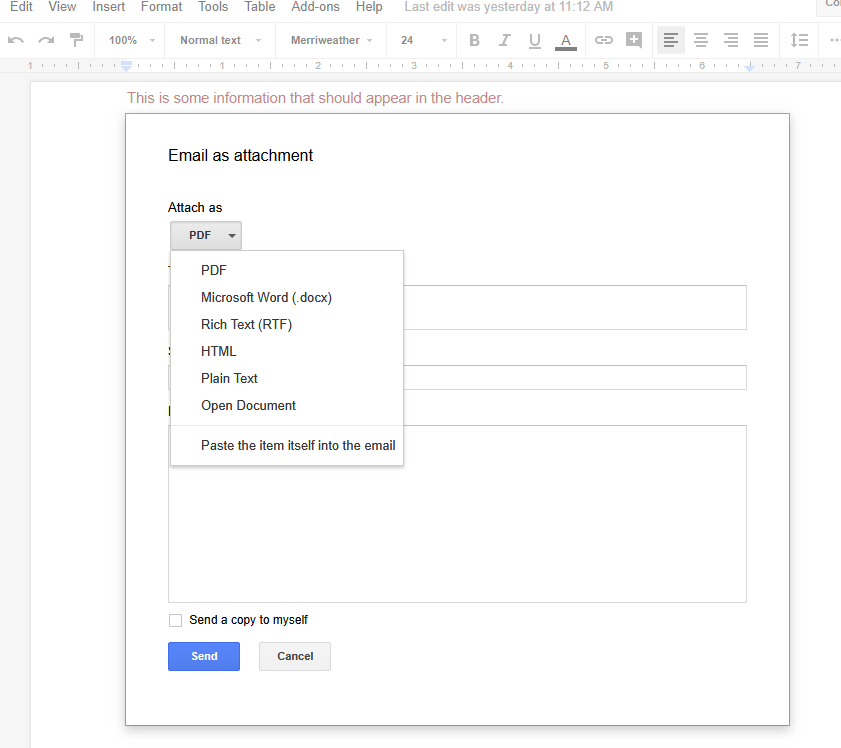
Had it been a word processing document, you would have seen the following options in the drop-down:
After choosing the format you can enter the email ids of all the people you want to share the document with.
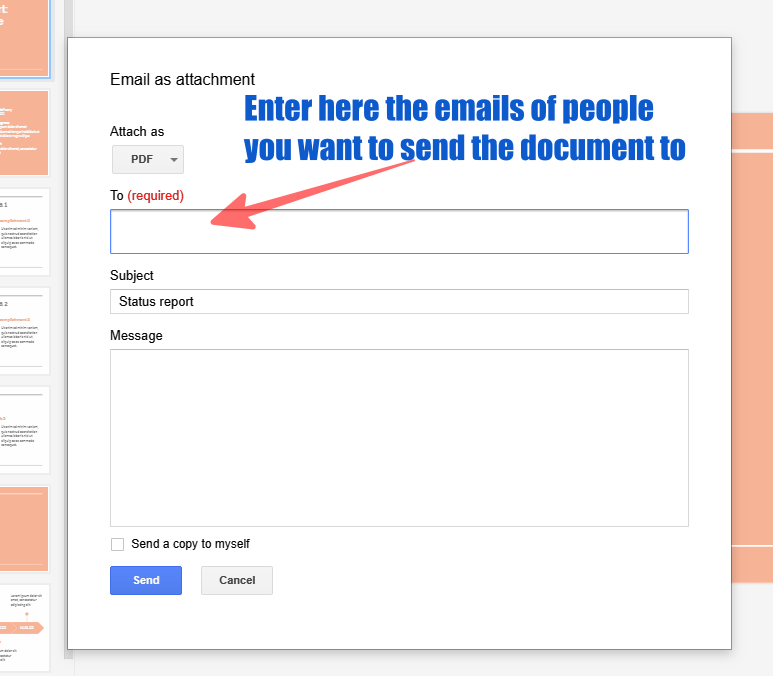
Click the Send button and your file will be sent as an email attachment to all the recipients included in the box above.
7. KEEP YOURS AND YOUR TEAM’S LEGAL ASSETS SAFE WITH GOOGLE SITES
In simple terms, Google Sites, a feature available with Google Workspace, can be understood as a web hosting service but instead of hosting a publicly accessible website (which you can do with Google Sites) you can create an internal website that is accessible to only authorised people.
You can use this site to link to important information, publish calendars and announcements that should reach all team members.
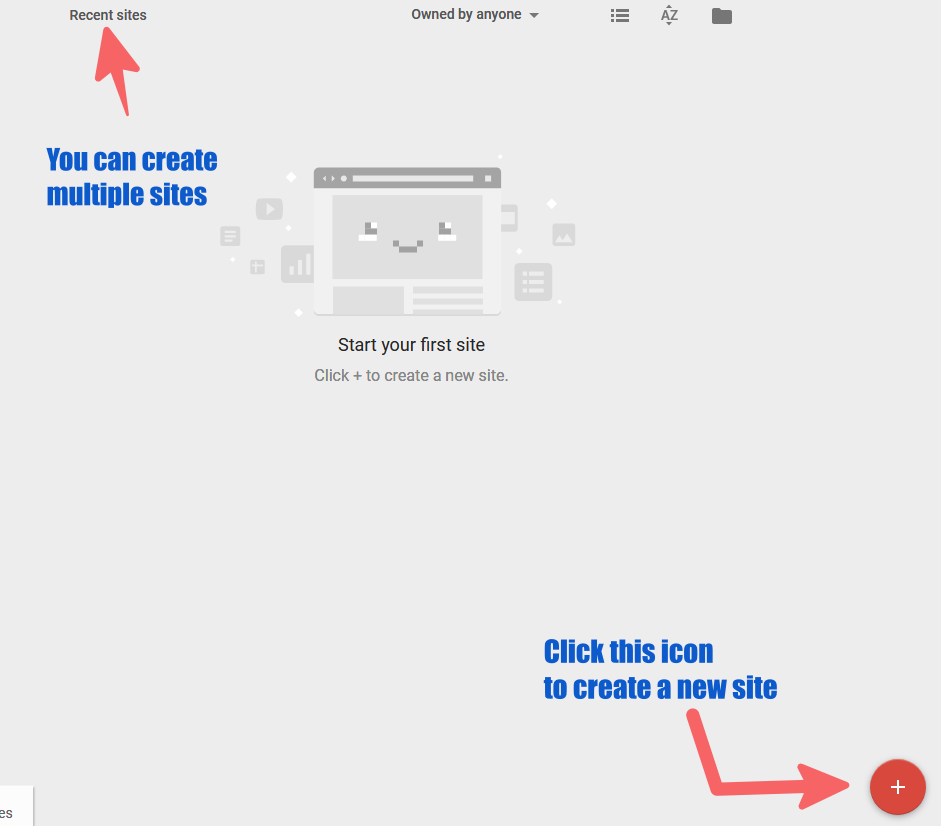
First, if you haven’t already done so, you need to create a site by going to the Sites homepage.
When you click GET STARTED, you come to this webpage:
The interface asks you whether you would like to take a tour, but you can skip that since you are already reading this tutorial.
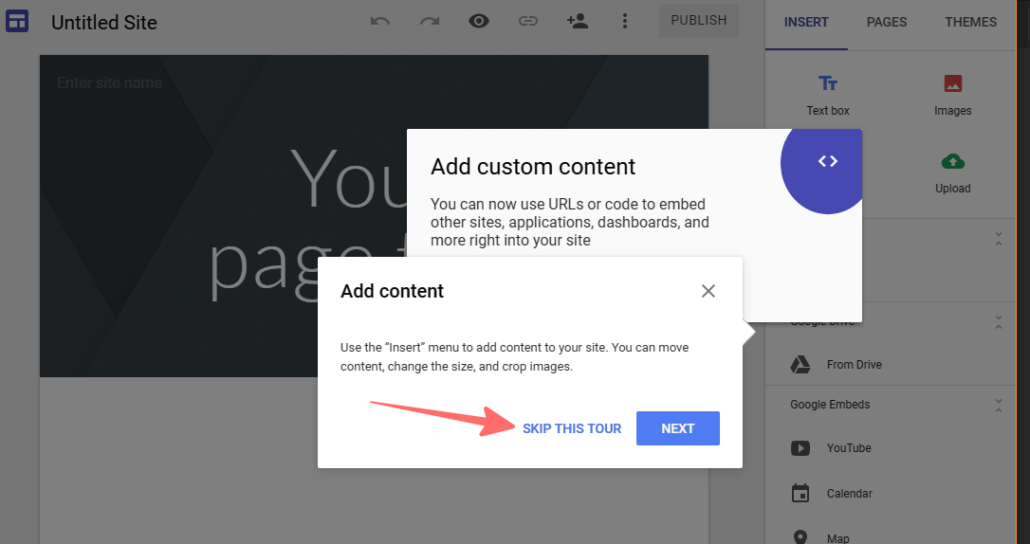
The ensuing dashboard gives you all the components that you need to create an average website.
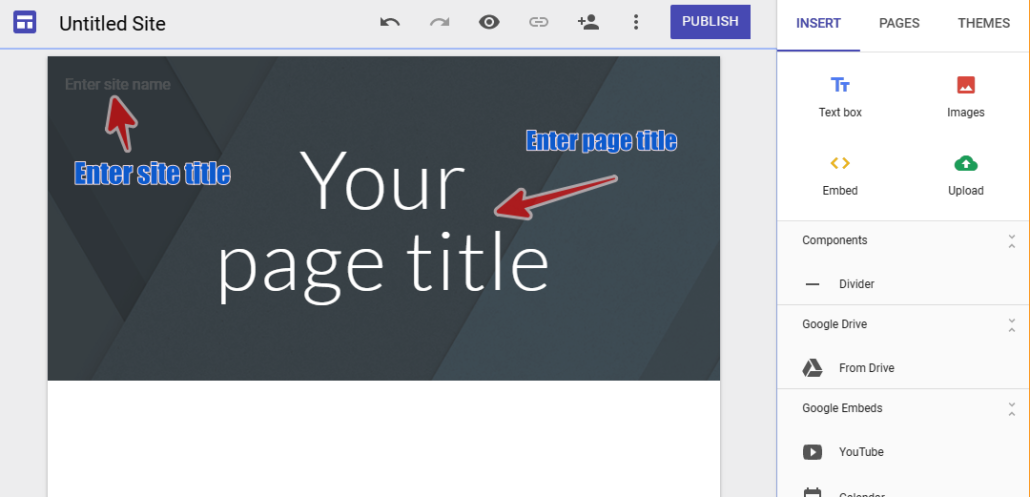
The site name and the page title are different. You enter the needed information and create your first web page. Since this tutorial is not on how to create a website using Google Sites, but on how to create a shared spot where authorized people can access your documents, let us quickly enter just the rudimentary information and click PUBLISH.
Once you do that, you come across the following screen:
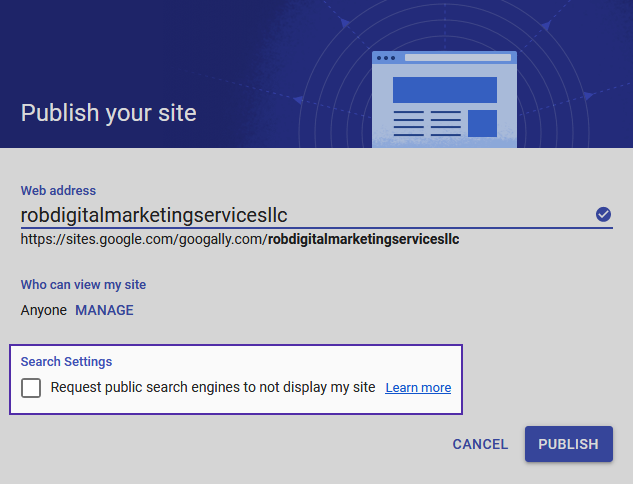
Referring to the above image, you will have to give a unique web address.
One important feature of this section is that it allows you to decide who all can access your documents and other confidential information that you are going to put on this shared site. So, click MANAGE.
The proceeding screen allows you to enter the email addresses of all the people with whom you would like to share your site.

In the above screen, you can also check the checkbox titled “Prevent editors from publishing, changing access and adding new people” to make sure that your documents remain secure.
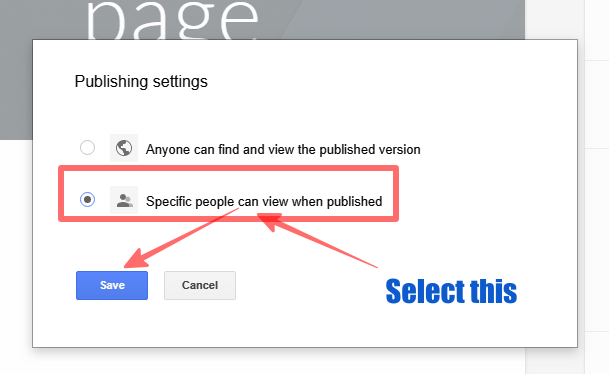
Also, you want to change the setting “Published – Anyone can find and view”.
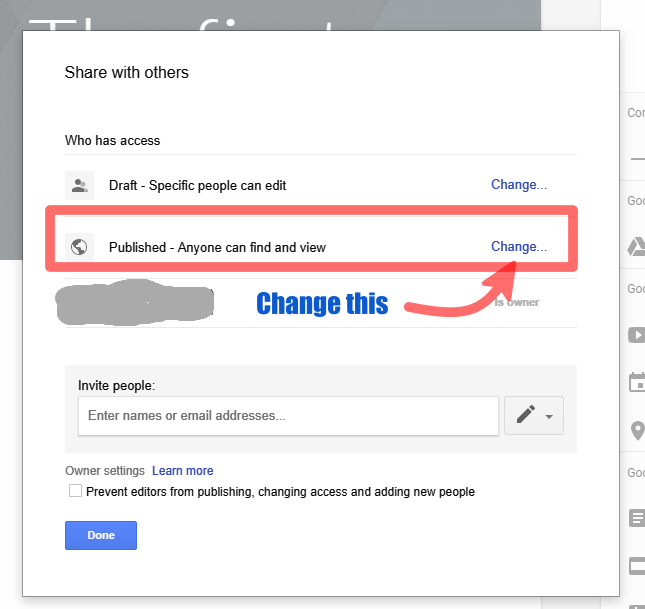
This is because you don’t want everyone to access your documents because you are going to store highly sensitive legal information on the site.
In the screen below, make sure that you check the “Request public search engines to not display my site” checkbox because you don’t want the search engine crawlers to crawl and index the information that you are going to put on your website.
Now you can safely PUBLISH the newly created site.

Want to see your published site? Follow the click path in the image below. This will copy the link to the clipboard and you can copy/paste the URL in the browser window.
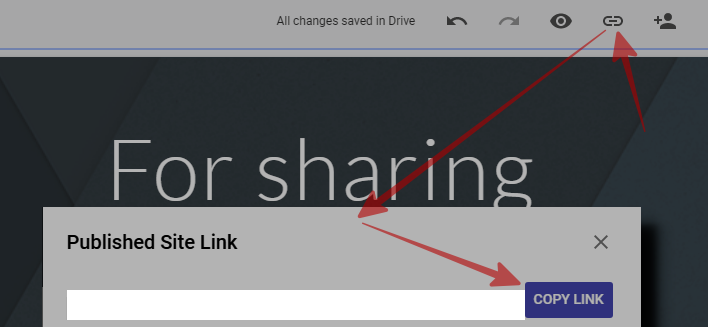
So, what do you do now?
You have just gotten yourself a blank web page.
How do you put information? For that, you need to use the sidebar in the site design dashboard. Suppose you want to put a Google Docs document on the web page. Go back to the dashboard…
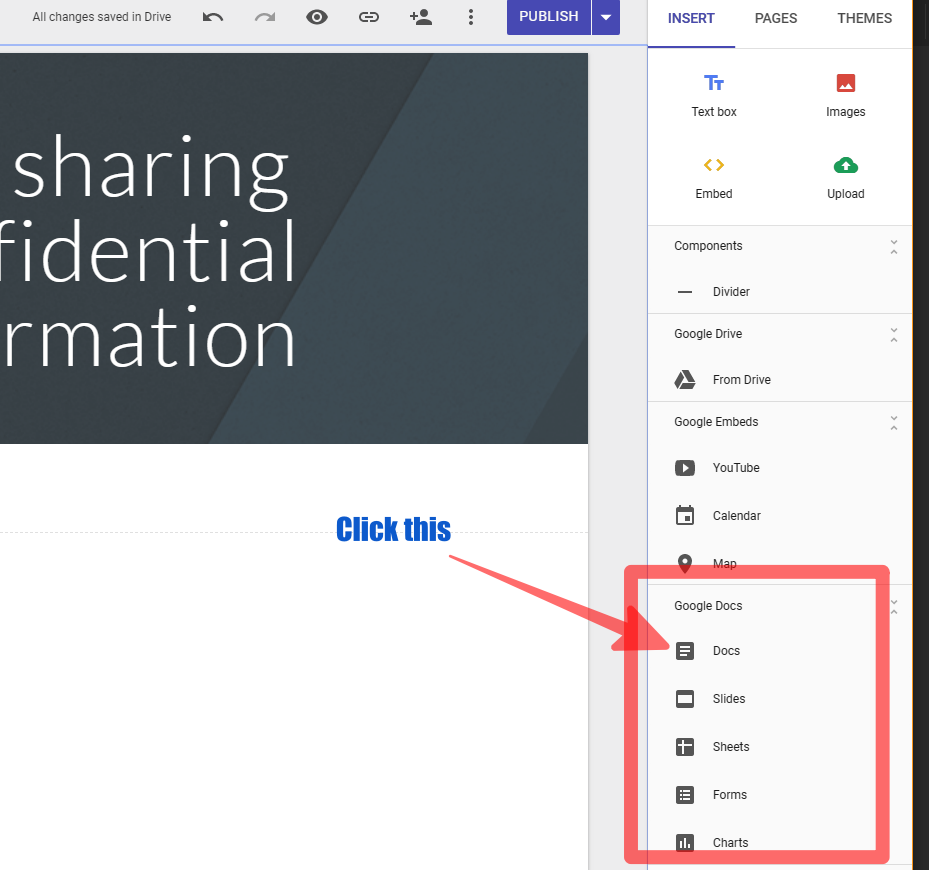
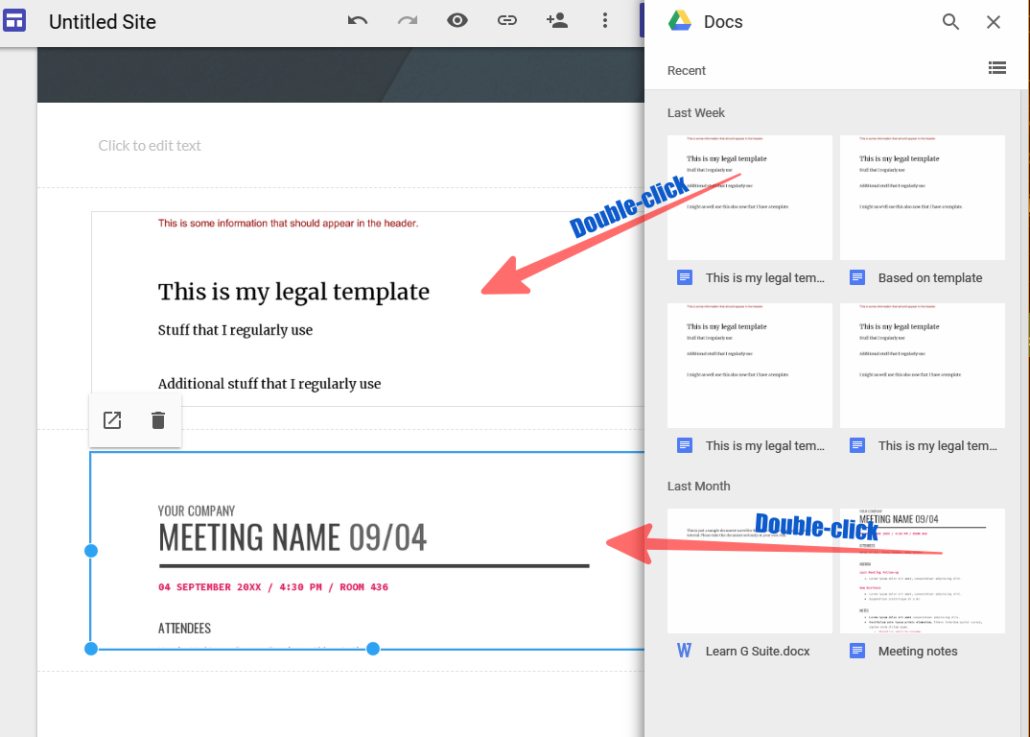
You will be able to see all the documents that you have created using Google Docs. You can choose whichever document you want to put into your Google Sites section.
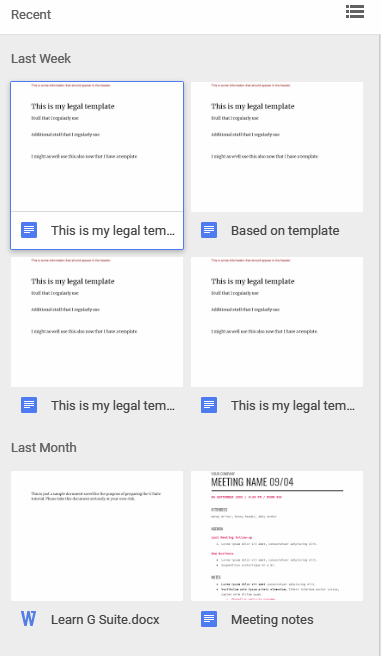
Double-click on individual documents and they will be added to your Google Site web page.
Click the PUBLISH button on your web page will be updated with the latest information. You can also insert links to various other documents and websites and web pages.
8. MANAGE YOUR LEGAL TEAM’S PROJECTS AND SCHEDULES FROM CENTRALIZED CALENDARS
Keeping track of everybody’s schedules and progress is a big part of running a successful law practice. In order to assess cases, coordinate between different subject matter experts and organize effective meetings, it is very essential that everyone is on the same page.
Through Google Calendar (a part of Google Workspace) you can easily plan out team agendas and ensure that all the team members can attend important deadlines.
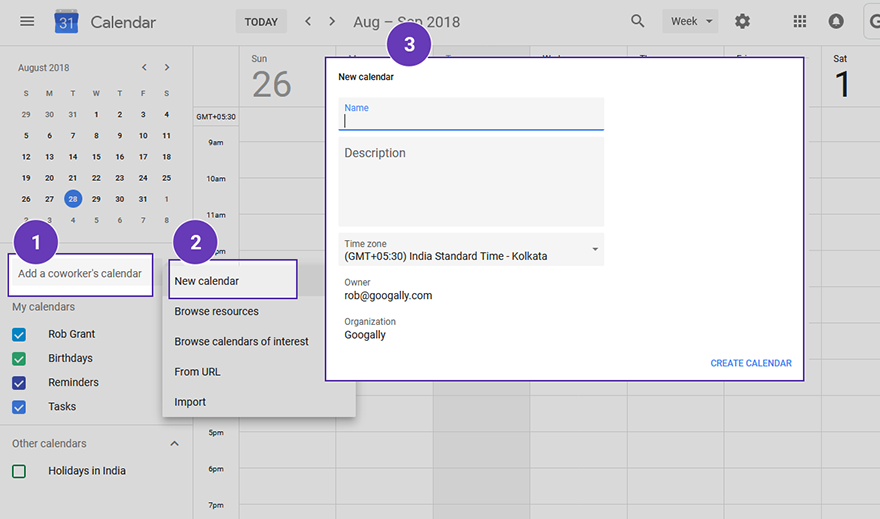
In Google Calendar you can either add existing calendars to your own calendar or you can create new calendars for your colleagues and team members. This way you can coordinate with your team members’ vacation schedules, business trips, availability schedules and upcoming deadlines, right from inside your own calendar.
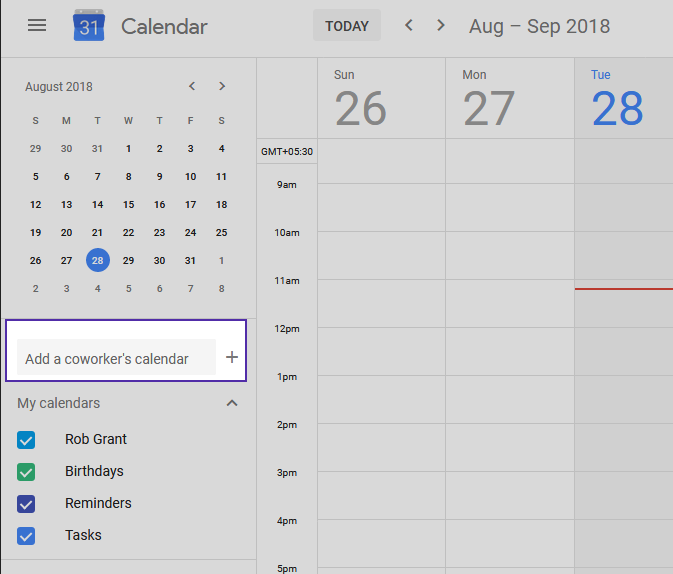
When you click the “+” icon in front of the “Add a coworker’s calendar” label, you get the following pop-up of choices from where you can select what sort of calendar you would like to add (or create a new calendar).
9. WORK IN GOOGLE DOCS EVEN WHEN THERE IS NO INTERNET CONNECTION
A big apprehension among those who would like to use a cloud-based service like Google Workspace instead of Microsoft Office is that, you need to be consistently connected to the Internet to be able to access and work on your documents, slides and even Google Drive.
It’s a misconception.
You may be planning to visit a place where they merely don’t have Internet access, and that’s perfectly fine. Even there you will be able to work on your documents.
Let’s first see how you can work in Google Drive without an Internet access, that is, when you’re offline.
Google Drive can be used two ways: entirely through your web browser, or by installing the Google Drive app on your PC (we will later and see how you can do the same on your mobile phone).
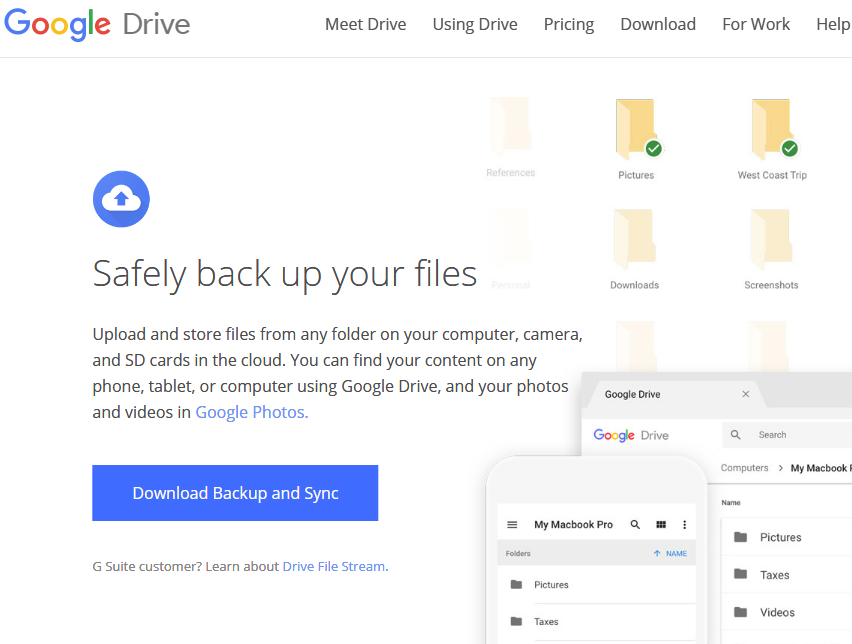
When you install the Google Drive app on your PC, a separate folder is created on your local drive and all the files that exist in Google Drive are synced with that folder.
This means, whatever you have on Google Drive, is also available locally on your computer.
This further means, since all the files are on your local drive, even when you don’t have the Internet connection, you can work on these files. When your Internet connection is resumed, the updated files will be automatically synced with the Cloud.
If you want to make Google Drive available offline on your mobile phone, first, launch Google Drive on your mobile phone and tap on the document that you would like to make available offline.
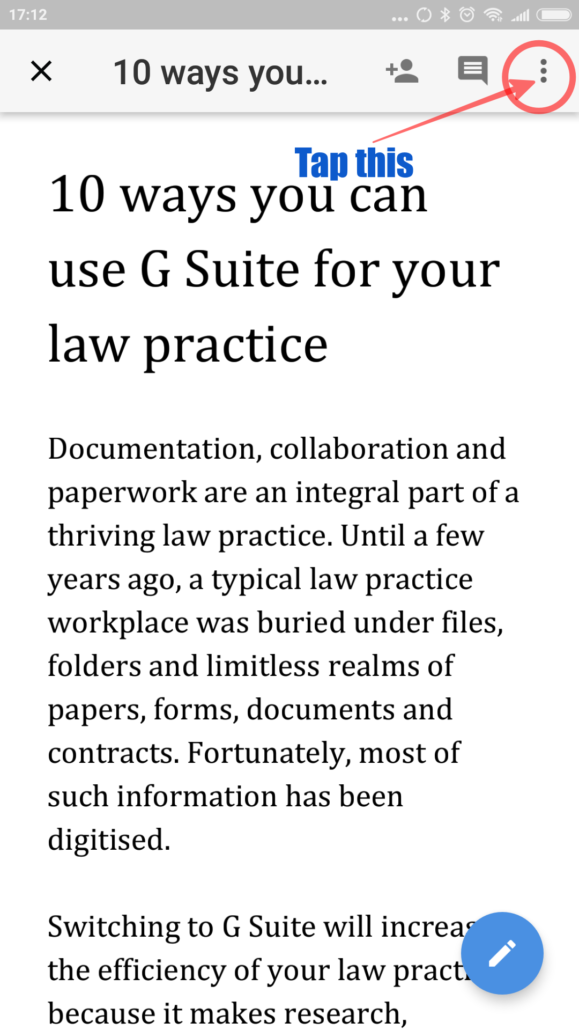
When you tap those three dots at the top-right corner, a pop-up of various options appears on the screen.
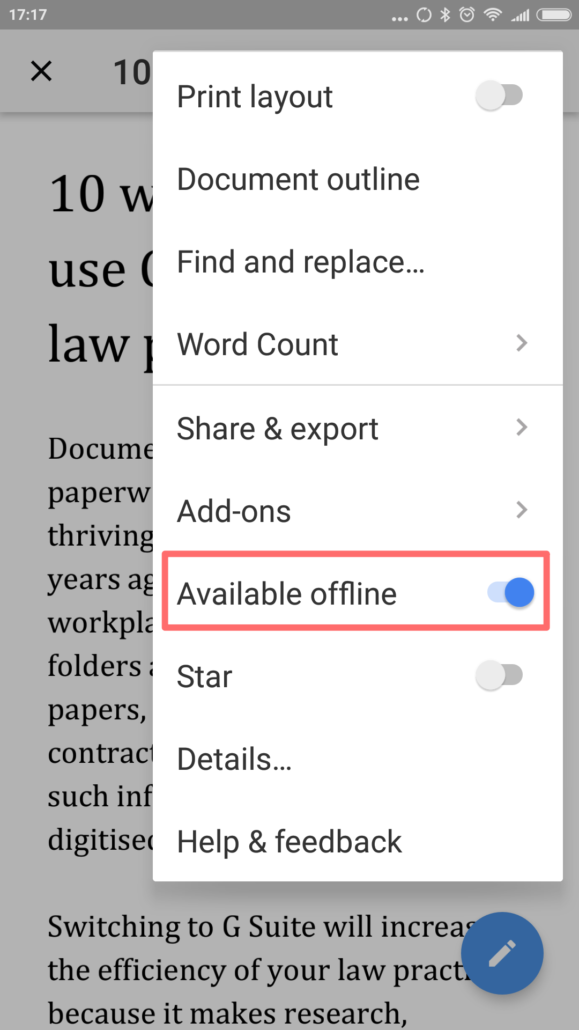
How do you access offline files when there is no Internet access?
Tap on those three horizontal lines at the top-left corner of your screen (Google Drive).
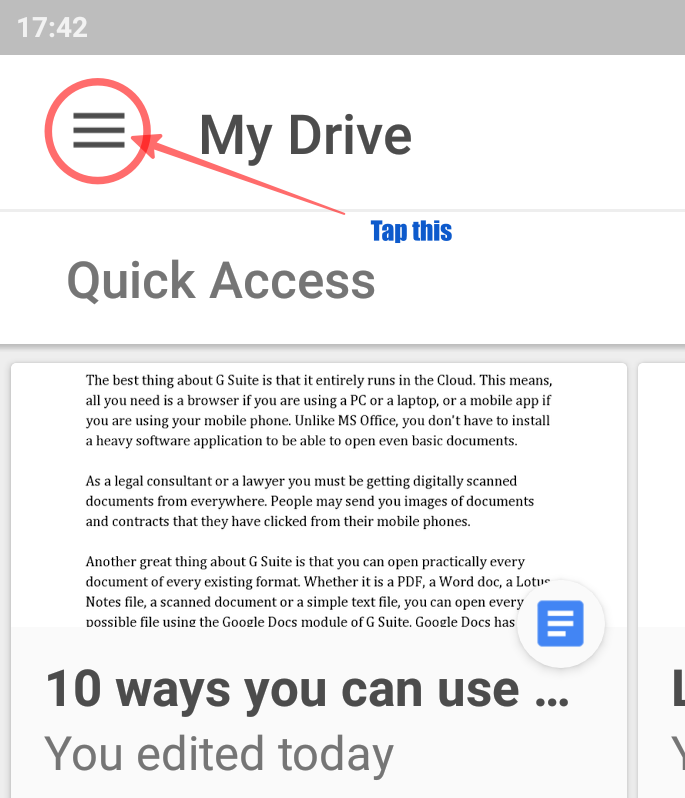
Tapping on the three horizontal lines results in this slider pop-up:
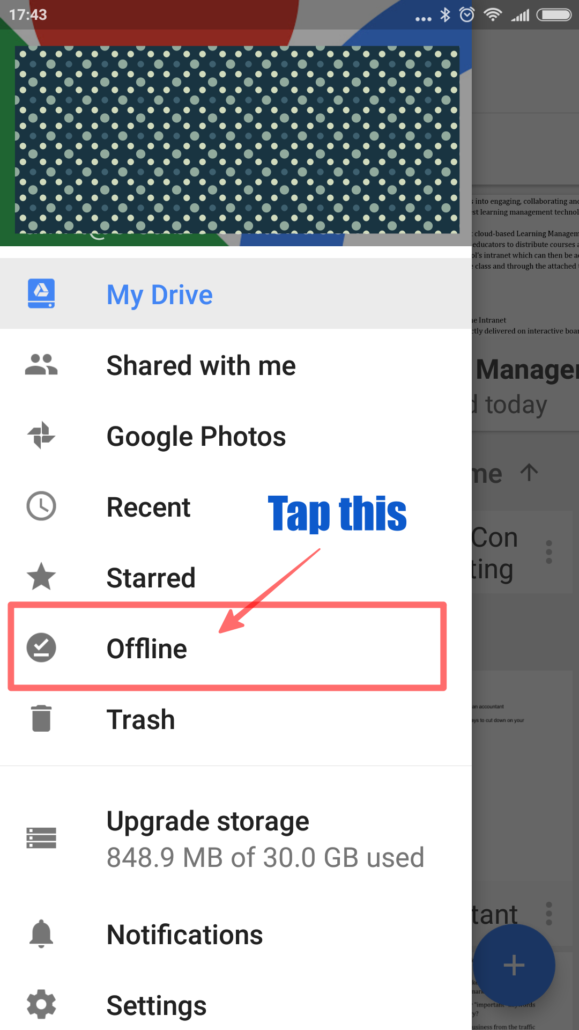
That’s it. Now all the offline files will be available to you on your mobile device. The next time your mobile phone connects to the Internet, all your files will be automatically synced with your online Google Workspace account.
Take note: At the time of making your files available offline, you need Internet access because then the latest versions of the files will be saved locally.
10. WORK ON YOUR MICROSOFT OFFICE FILES AND DOCUMENTS DIRECTLY IN GOOGLE DRIVE
Millions of people are still using Microsoft Office and you are continuously going to receive files and documents prepared in this office suite. When you regularly start using Google Drive, you will develop a habit of storing all the files that you receive in your Cloud drive.
You can directly open your Microsoft Office files from Google Drive, work in those files, and then save those files directly to Google Drive by default. Here is what you need to do…
- Install Google Drive on your PC or laptop if you haven’t already done so (where you plan to use Microsoft Office).
- Wherever you have set the Google Drive folder to be (by default it is installed on drive C:, but you can choose your preferred drive or your preferred location), transfer your “Documents” folder into the Google Drive – Microsoft Office uses this particular folder to process gets documents, slides and other work-related files.
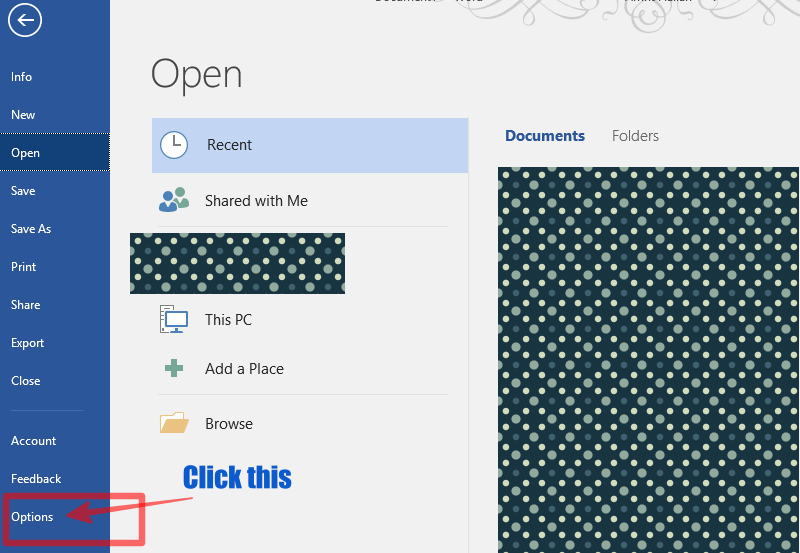
- Launch one of the MS Office apps – let it be MS Word for the time being.
Either open a blank document or open an existing document (for the time being you are not going to work in a document) and then click File. In the slider pop-up, click Options.
5. In the proceeding section, first click the “Save” tab and then click the “Browse…” button facing “Default local file location:”
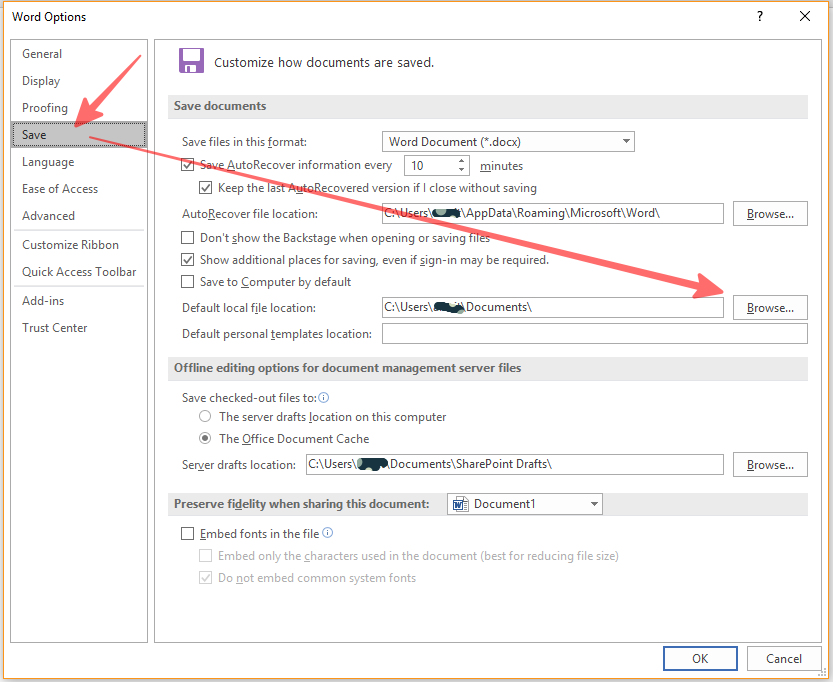
Go to the folder that you would like to use as your default folder (the one that you have defined in your local Google Drive folder).
Once you have selected the folder of your preference, click OK in this screen and you are all set to go. After this, whenever you create new documents in MS Office, they will be stored in your Google Drive.
CONCLUSION
In this detailed tutorial you have learned that there is practically nothing to stop you and your law practice to switch over to Google Workspace. It not only frees you up from your office desktop (since you can work from any device of your choice), it also increases yours and your team’s efficiency manifold.
Stay tuned for more reasons to switch to Google Workspace.
Related Posts
Explore Tips and Guides! Discover expert insights and practical guides for optimizing your Google Workspace experience with our informative resources.


.png)
.png)


