Setup Gmail on MS Outlook for Windows
Step 1
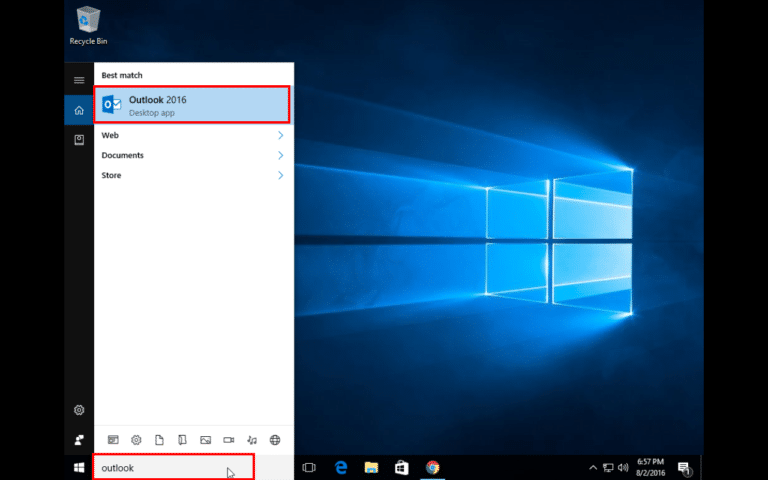
- Open Microsoft Outlook 2016 at your Windows machine (if you are using Windows 10 you can simply search for Outlook).
Step 2
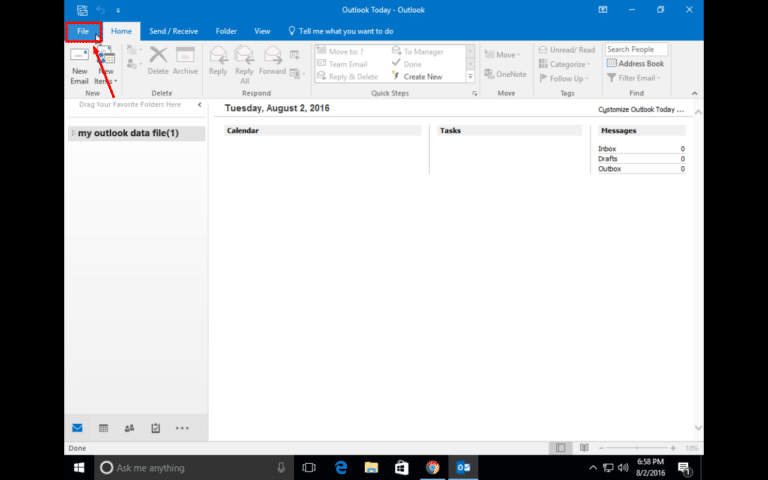
- Click on the File menu in top left hand corner as shown in the screenshot.
Step 3
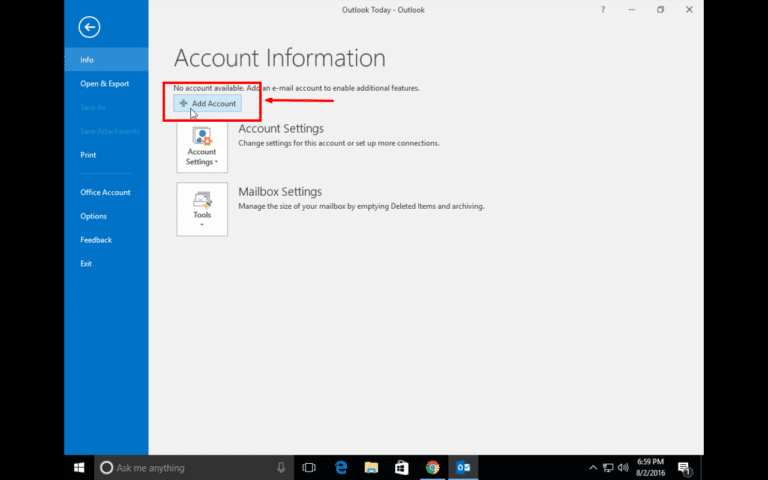
- As we will add gmail account to Outlook 2016, click on Add Account as shown in the screenshot.
Step 4
- We will setup Outlook 2016 to work with your gmail manually
- Select Manual Setup or additional server types
- Click Next

Step 5
- We will configure your Google Workspace for business gmail via IMAP as it provides better functionality than POP.
- Select POP or IMAP radio button
- Click Next

Step 6
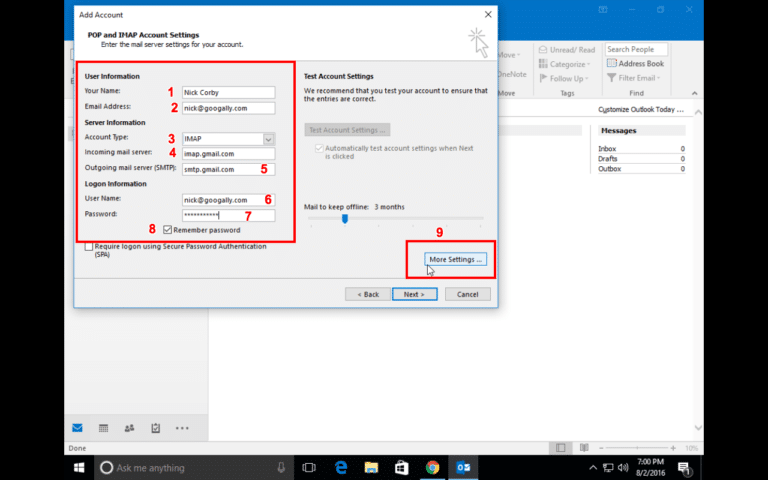
- Enter your name in the name field
- Enter your Google Workspace (or gmail) email address in Email field
- Under account type, select IMAP
- Put imap.gmail.com in the incoming mail server
- Put smtp.gmail.com in the outgoing mail server
- In user name, enter you full google apps email address as shown in the screenshot
- Enter your google apps gmail password
- Leave the remember password checked
- Click on More Settings
Step 7
- Check the box which says “My outgoing server (SMTP) requires authentication
- Click on Advanced tab

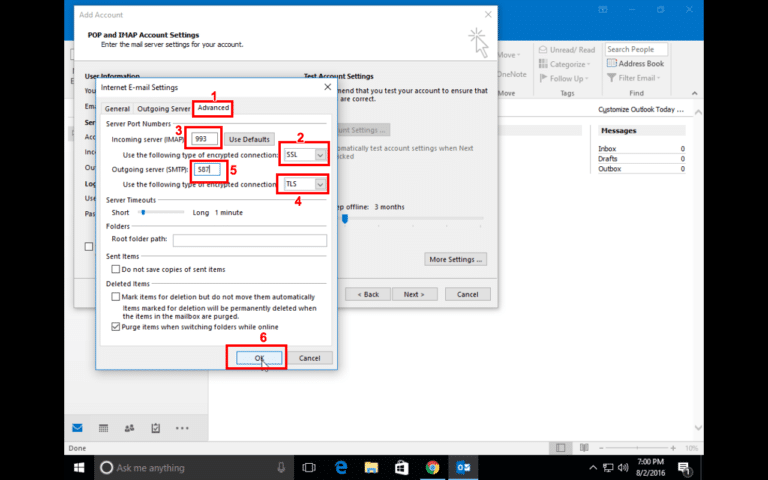
Step 8
- Click on Advance Tab
- For incoming server (IMAP), select SSL from the dropdown as shown in the screenshot
- Now make sure the port number is changed to 993
- For outgoing server (SMTP), select TLS from the dropdown as shown in the screenshot
- Now change the port number manually to 587
- Click Ok
Step 9
- Click Next
- A window will open to test our settings and connection
- Once the tests are passed, click on close to close this window
- Click Next

Step 10
- You will see a message now saying “You are all set!”.
- Click on Finish

Step 11
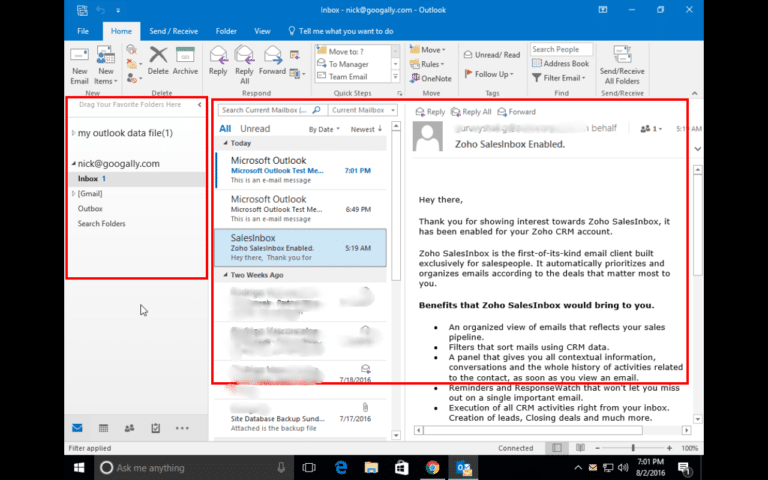
- If you have followed so far, you will see all your google apps emails coming in your Microsoft Outlook 2016
- If you need any help, fill up the form below to contact us
Related Posts
Explore Tips and Guides! Discover expert insights and practical guides for optimizing your Google Workspace experience with our informative resources.


.png)


