Gmail Auto Responder
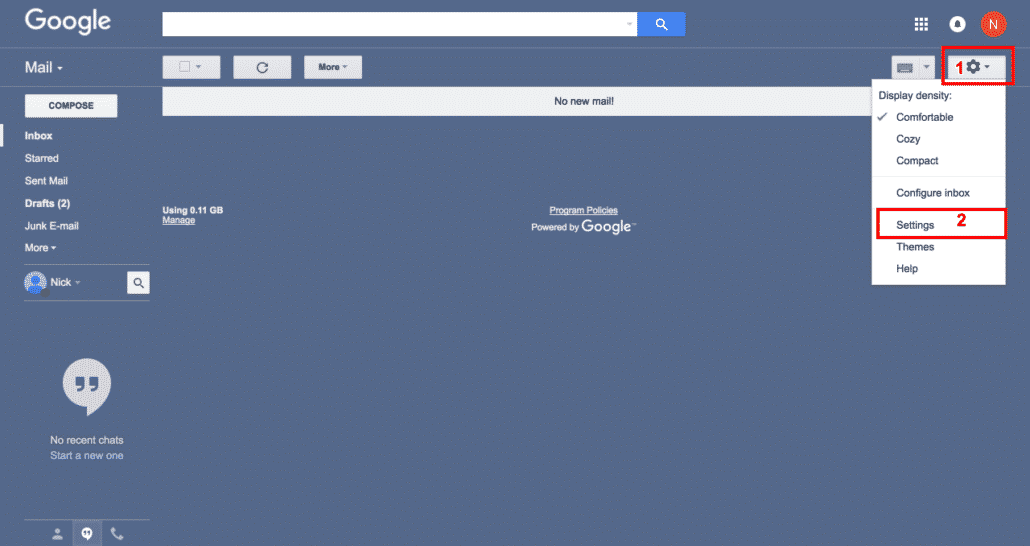
1. Login to your Gmail
- Go to mail.google.com and enter your Google Workspace email id and Password to login.
- Go to Gmail settings on the top right hand corner as shown in the screenshot

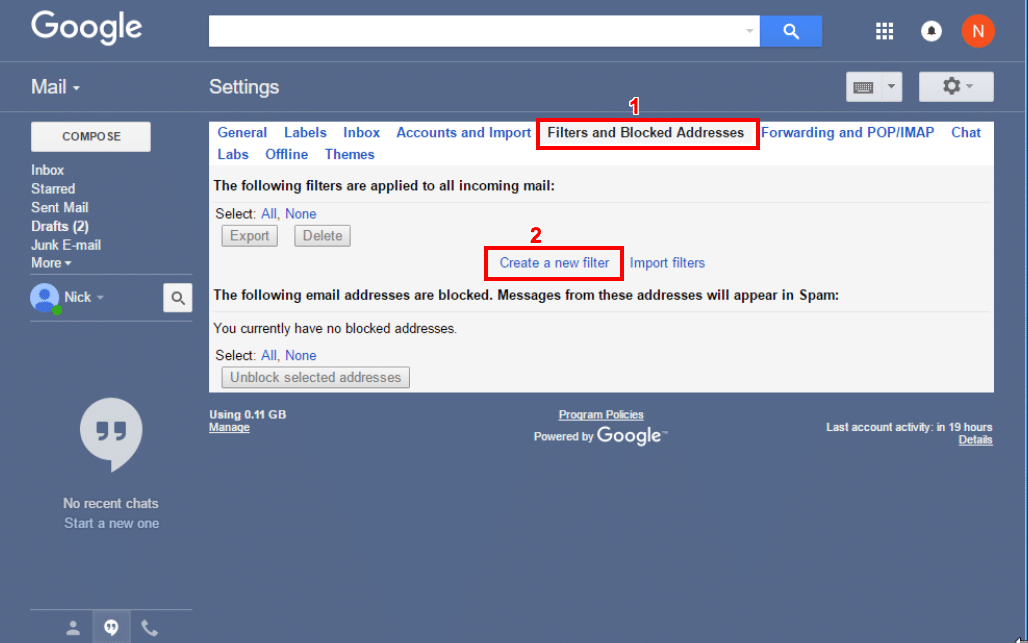
2. Go to Gmail Filters to create one
- Go to your Gmail Filters and Blocked Addresses tab
- Click on Create a New Filter as we will create a new filter to send auto responses from Gmail

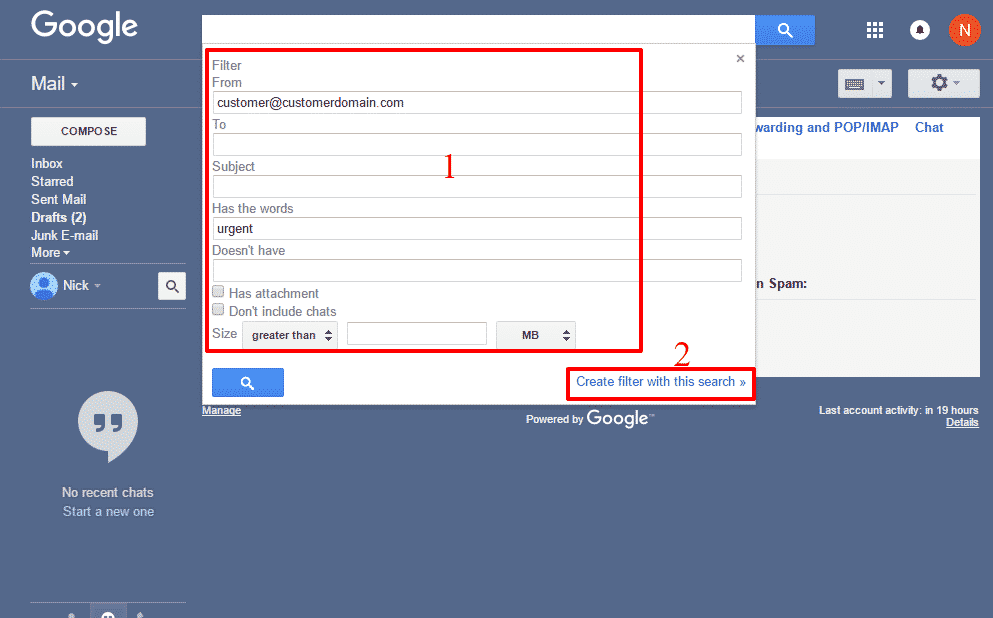
3. Enter your Gmail Filter criteria
- Enter your filter criteria in filter box provided by Gmail, you can anything like sender address, has the words etc.
- Click on Create Filter with this search

4. Apply your Canned Response
- Click on the Send Canned Response checkmark
- Select and apply your canned response, this will be sent as auto reply
- Click on Save changes
If you do not see Canned Response in the list, this means you have not created one yet, you can create one quickly following these easy steps, Canned Responses Gmail

Success! Your Gmail Auto Reply is now configured
- Send yourself an email from any other email id, if it matches your criteria then you should be getting auto reply from Gmail.
- Note – If you have setup your auto reply based on sender, then it’ll only work if an email comes from that sender
- Scroll below to see answers to questions others have asked about Gmail auto replies

FAQs
My gmail autoresponder not working, why?
Most of the times it has to do with your criteria and canned response, make sure to meet the filter criteria when you test your auto-responder.
Also, you should always test it from another email id than your own.
Gmail Autoresponder Rules, Which ones can I apply?
What is advance use case for automatic responses?
How to send automatic emails in gmail?
Will the autoresponder work with iPhone and Android?
Does it work with Microsoft Outlook?
Is this vacation responder too?
Can I insert attachments in canned auto replies?
Related Posts
Explore Tips and Guides! Discover expert insights and practical guides for optimizing your Google Workspace experience with our informative resources.


